

Credits
This guide is based on the excellent hands-on article MAAS - Metal as a Service by Lorenzo Comotti (Overflow Journal), reworked and condensed for this wiki.
Why MAAS?
Virtual machines give you instant flexibility, but some workloads still demand physical servers: raw performance, data locality/security requirements and so on.
The pain with bare metal has always been the manual ceremony: walk to the rack (or open the BMC console), mount an ISO, install the OS, partition the disks, configure the network, repeat for every single box.
It obviously doesn’t scale past a handful of machines.
MAAS (Metal as a Service), by Canonical, turns that ceremony into an API call: it discovers physical servers over the network, inventories their hardware, and deploys operating systems on them: PXE boot, disk layout, network config, SSH keys, everything.
Think of it as an intelligent control panel for your datacenter: bare-metal hardware managed with the same fluidity as a cloud.
Architecture
MAAS is built from three components:
flowchart TB
    subgraph region["🌍 Region level"]
        API["Region Controller<br/>(API + UI, stateless,<br/>horizontally scalable)"]
        DB[("PostgreSQL<br/>all infrastructure state")]
        API <--> DB
    end

    subgraph rack1["🗄️ Rack level"]
        RC1["Rack Controller<br/>DHCP · TFTP · IPMI"]
        S1["Server 1"]
        S2["Server 2"]
        RC1 -.PXE / power control.-> S1
        RC1 -.PXE / power control.-> S2
    end

    API <--> RC1
| Component | Role |
|---|---|
| PostgreSQL | Stores all infrastructure state: machines, networks, images, users. |
| Region Controller | The brain: API, web UI, coordination across the whole region. Stateless, so it scales horizontally. |
| Rack Controller | The hands: lives close to the machines, provides the network services deployment needs (DHCP, TFTP for PXE, IPMI power control) and talks to the region. |
Why the region/rack split matters
Rack controllers only need visibility of their own rack’s networks. This way, the region controller never has to reach every management network in the datacenter: each rack controller acts locally on its own scope.
In a standalone installation (this guide) a single host wears both hats: it is region and rack controller at once, so you’ll see both roles listed under the Controllers section of the UI.
Prerequisites
Minimum resources for a standalone install:
| Resource | Minimum |
|---|---|
| CPU | 4 cores |
| RAM | 8 GB |
| Disk | 20 GB |
| NIC | 1 (2 if you manage IPMI too) |
| OS | Linux: Ubuntu recommended |
| Network | Internet access (image sync) |
You should be comfortable with bash and Layer 2 networking concepts (VLANs, broadcast domains): MAAS is all about L2 visibility.
The lab used throughout this guide:
- MAAS host: a VM with 8 vCPU / 16 GB RAM / 50 GB SSD, Ubuntu 24.04 LTS
- 2 NICs: one on the management network (
10.100.129.0/24), one on the IPMI network (10.100.130.0/24) - Target hardware: a Dell PowerEdge R640
Installation
Start from a fully updated system:
sudo apt update
sudo apt dist-upgrade -y
sudo reboot
MAAS installs either via snap or via APT.
Pick ONE method
Snap or APT, never both: installing through both channels causes package conflicts and hard-to-debug malfunctions.
Via snap:
sudo snap install --channel=3.7/stable maasOr via APT:
sudo apt-add-repository ppa:maas/3.7
sudo apt update
sudo apt -y install maas
This guide uses 3.7: check Canonical’s docs for the currently supported versions.
PostgreSQL is installed and wired up automatically.
For production you’d want it in high availability, but for a standalone lab the bundled instance is fine.
Create the admin user:
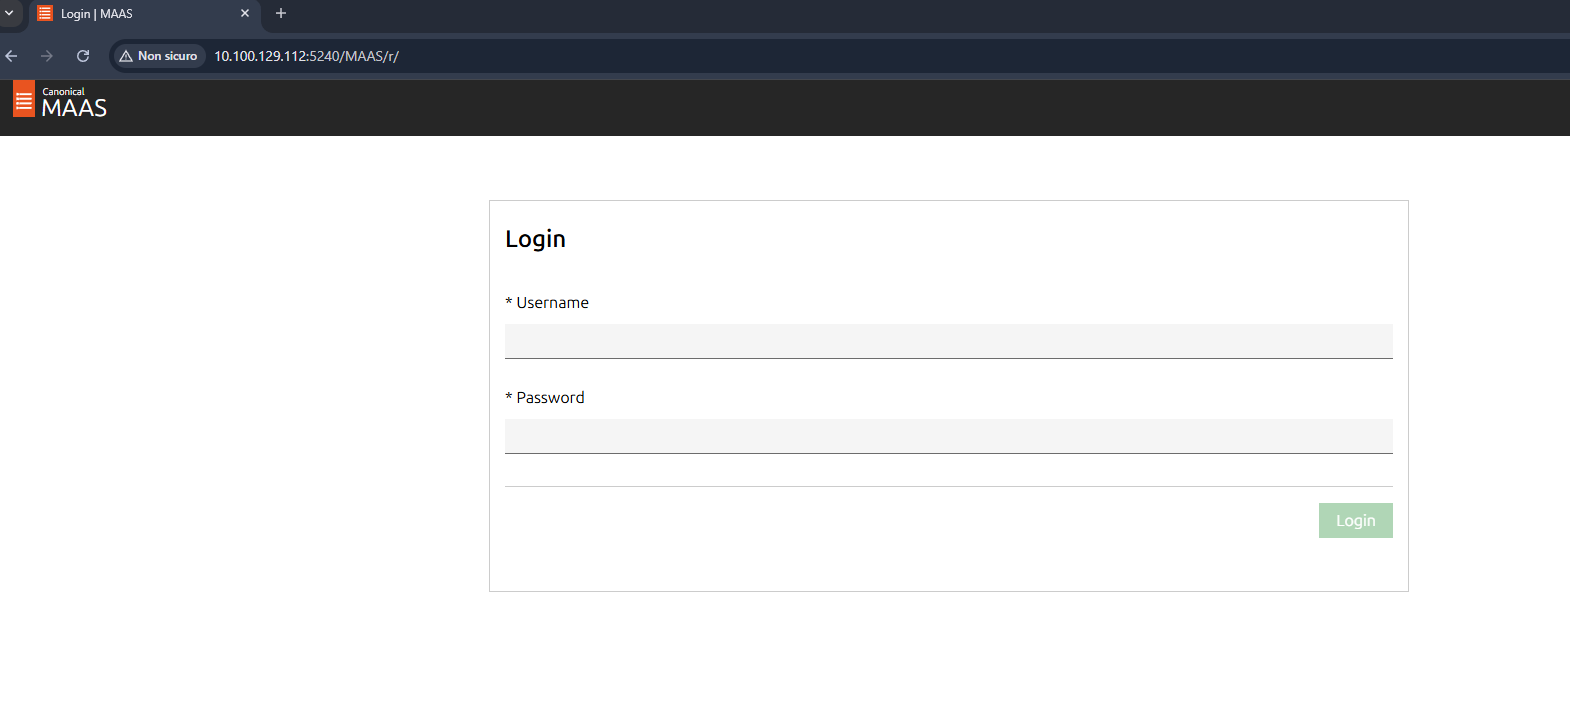
sudo maas createadmin --username=$PROFILE --email=$EMAIL_ADDRESSThen point a browser at the server IP on port 5240:
http://<maas-ip>:5240/MAAS
Initial configuration
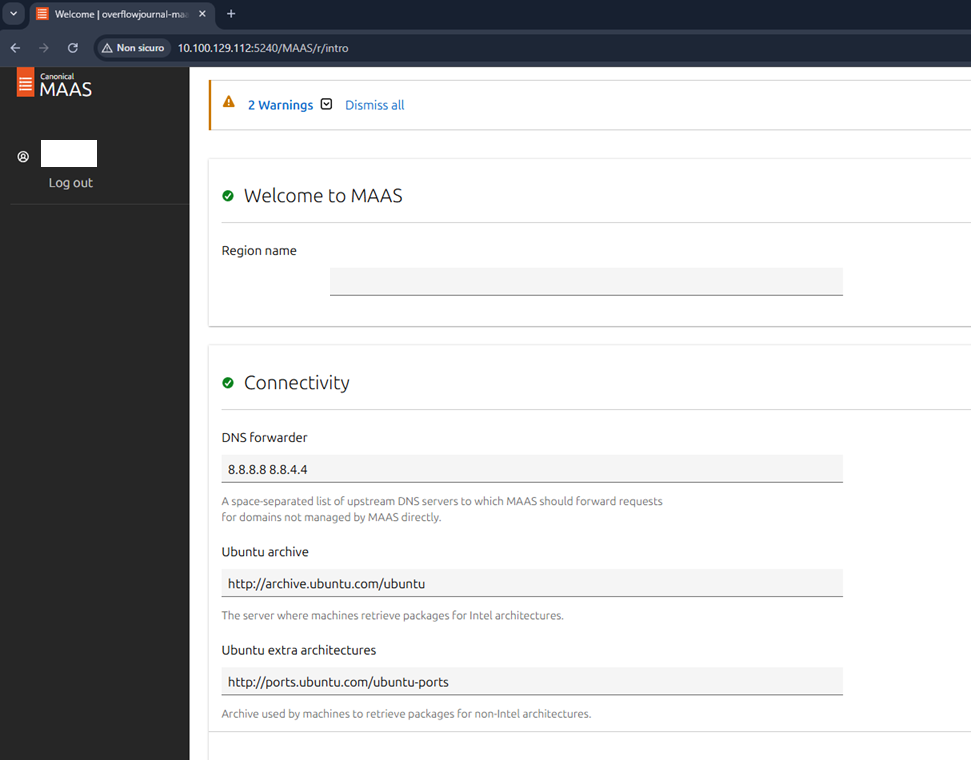
Region name and DNS
The first-run wizard asks for a region name and the DNS servers MAAS will hand to managed machines.
OS images
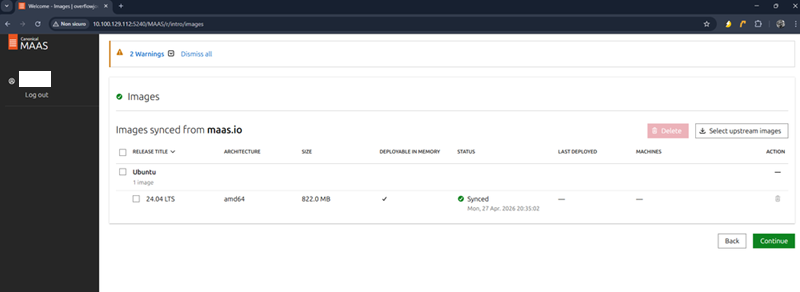
Select which OS images MAAS should import.
Ubuntu 24.04 LTS is proposed by default, but more can be added at any time.
SSH key
No key, no access
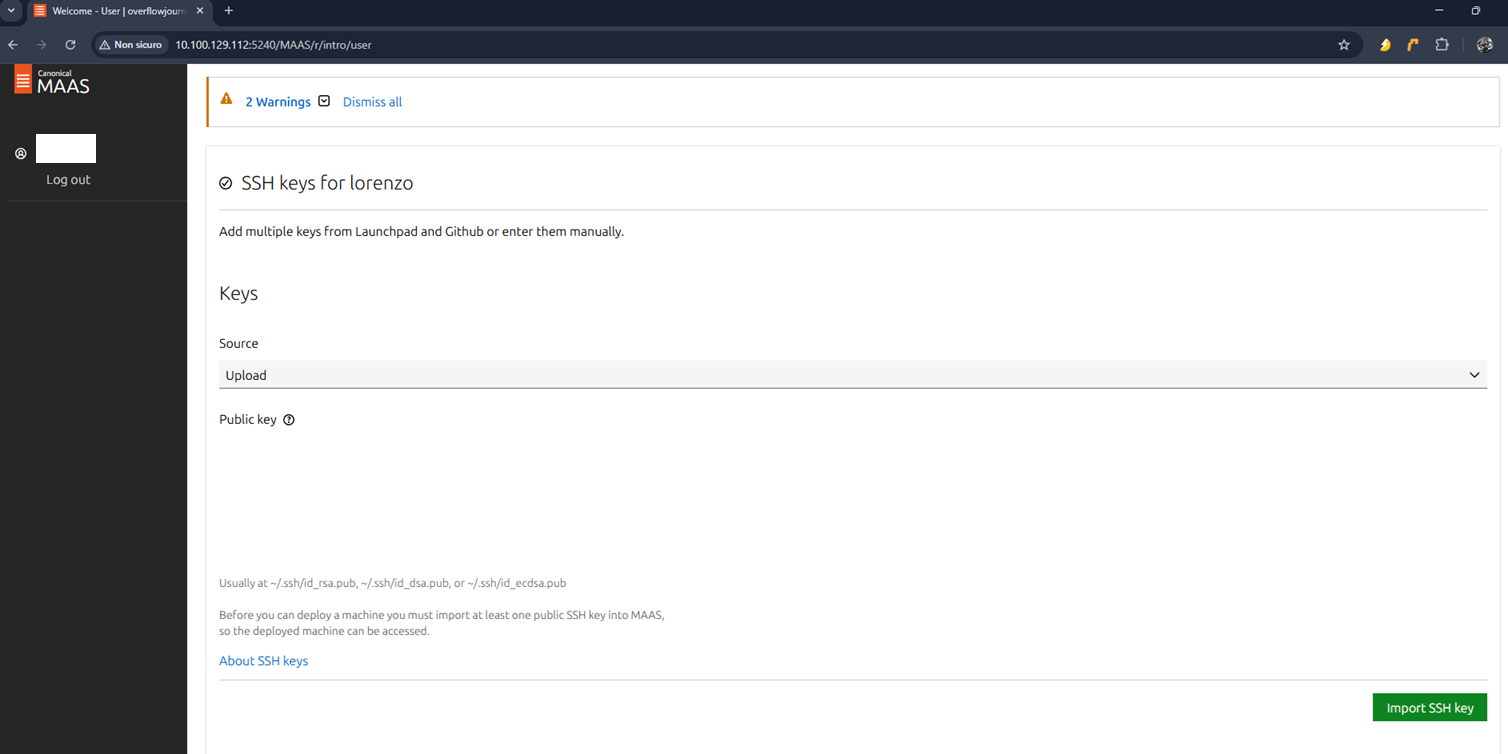
If you don’t configure a public SSH key here, you will not be able to log into the servers MAAS deploys.
The key gets injected into every deployed OS.
Import your personal public key (from file, GitHub or Launchpad).
Prepare the first environment
Pool
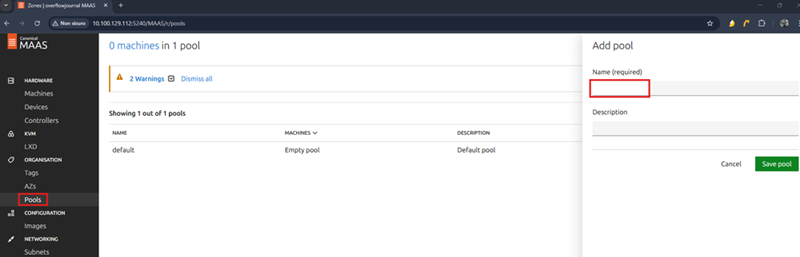
Pools group machines logically: useful to split environments (prod, staging, developement…) and filter searches.
Create one for your environment.
Domain
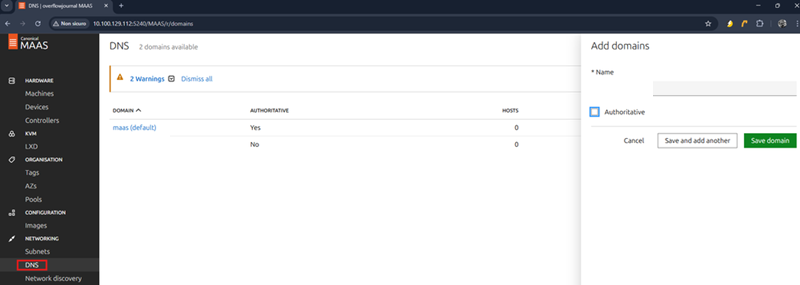
MAAS can work as a DNS server too: it ships with the .maas zone as default.
Add your own domain if you want machines to receive a proper FQDN at deploy time.
Network objects
Before touching the UI, learn the four MAAS network primitives:
| Object | What it is |
|---|---|
| Fabric | A logical container for networks belonging to the same physical infrastructure (e.g. a “VMware” or “OpenStack” fabric). Holds VLAN+subnet combinations. |
| Space | A functional grouping of subnets: “management”, “backend”, “ipmi”… |
| Subnet | An IP network. Always attached to exactly one VLAN. |
| VLAN | The L2 segment (VID). Belongs to a fabric. |
L2 visibility is everything
The rack controller must have Layer 2 visibility on the target servers’ management network and also on their IPMI network.
If PXE broadcast frames can’t reach the rack controller, nothing downstream works.
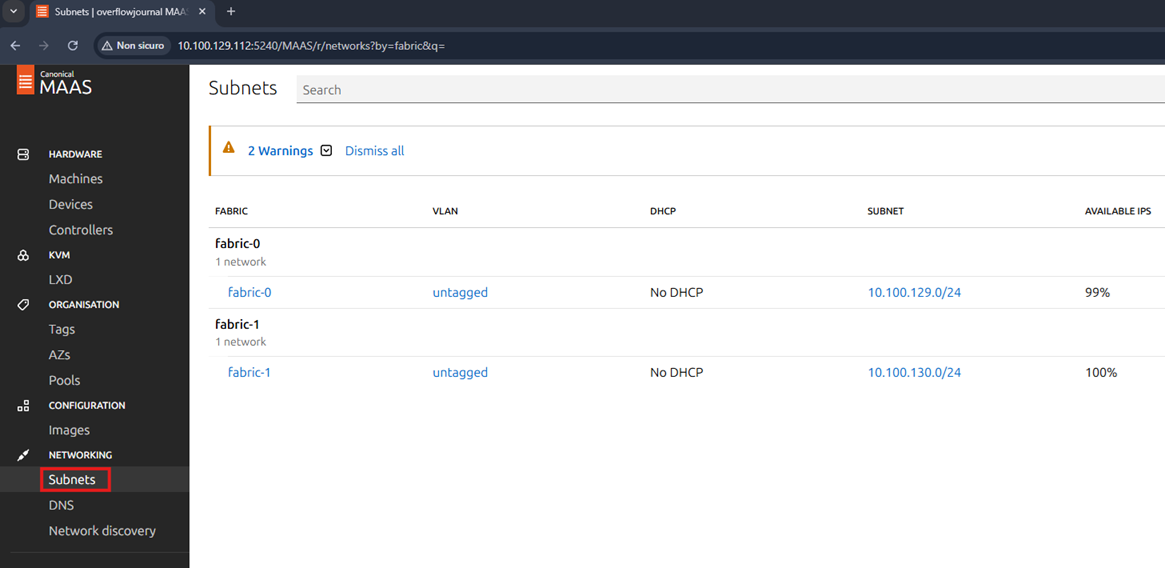
MAAS auto-discovers the subnets its NICs sit on: they appear under generic names (fabric-0, fabric-1).
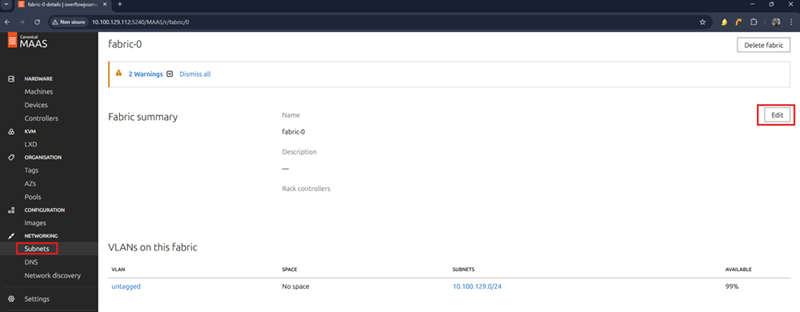
Rename everything to something meaningful:
fabric-0→openstack-managementfabric-1→openstack-ipmi
Then we create two spaces: management and ipmi
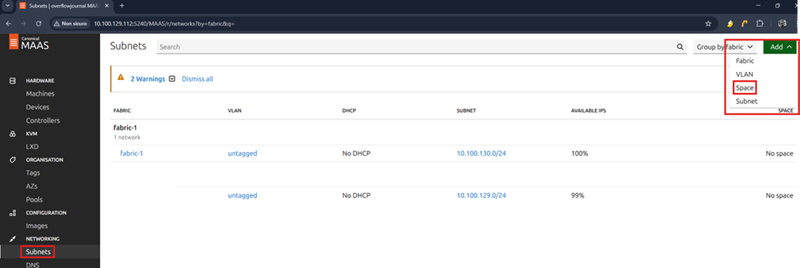
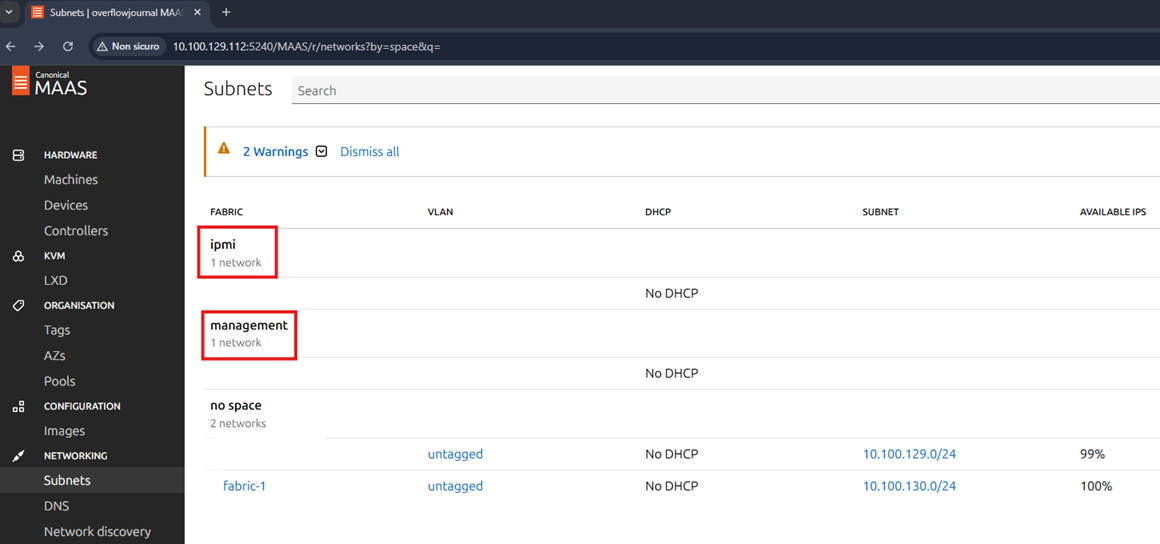
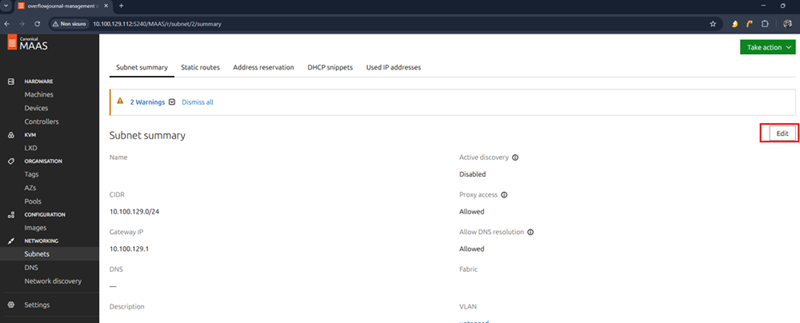
Now we select the subnets by clicking on them, and we rename them:
10.100.129.0/24→ “openstack-management`10.100.130.0/24→openstack-ipmi
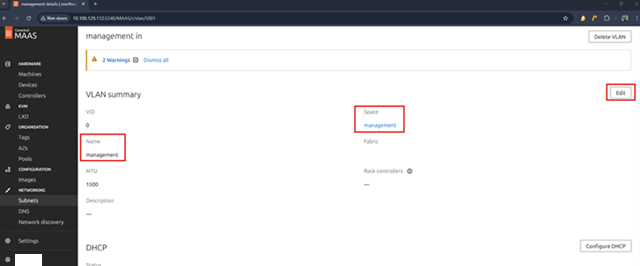
Ok, now only the VLAN configuration remains.
On each fabric, take the untagged VLAN (by clicking on “untagged”), rename it and assign it to its space:
DHCP
PXE boot needs DHCP: the machine being provisioned gets a temporary IP from MAAS to communicate during enlistment and deploy.
Check the range twice
Make sure the DHCP range you reserve is genuinely free.
Overlapping with an existing DHCP server or with statically-assigned IPs on the same segment means conflicts that are painful to debug.
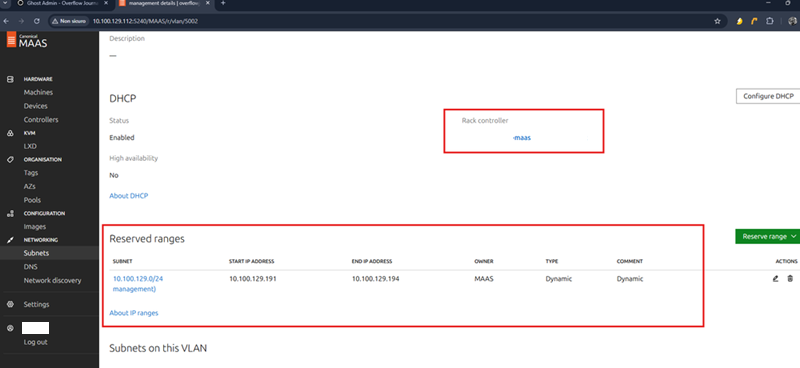
On the management VLAN: Configure DHCP → select the rack controller that will serve it → define the temporary IP range (we don’t need it for the IPMI VLAN).
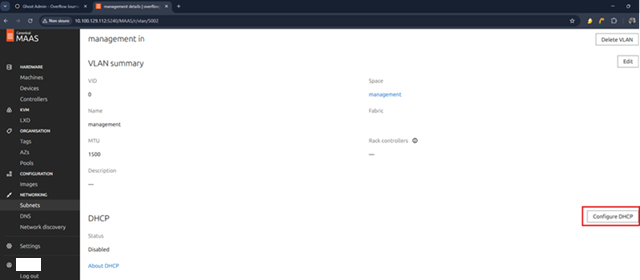
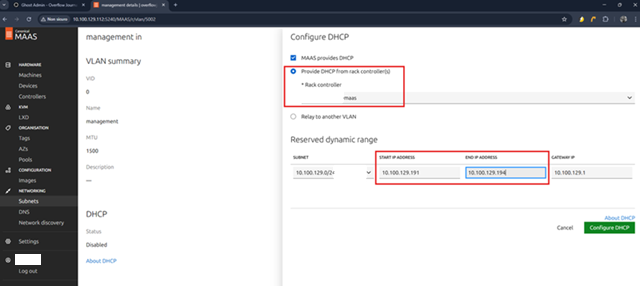
This should be the final result:
Prepare the physical server
Example hardware: Dell PowerEdge R640 (any IPMI-capable server works the same way).
Switch ports
The NIC used for PXE boot must be on the same L2 segment as the rack controller’s management network.
Verify the switch port configuration (VLAN, no port security blocking DHCP) before blaming MAAS.
BIOS settings
- Enter the BIOS
- Boot mode → UEFI (required by modern OS versions)
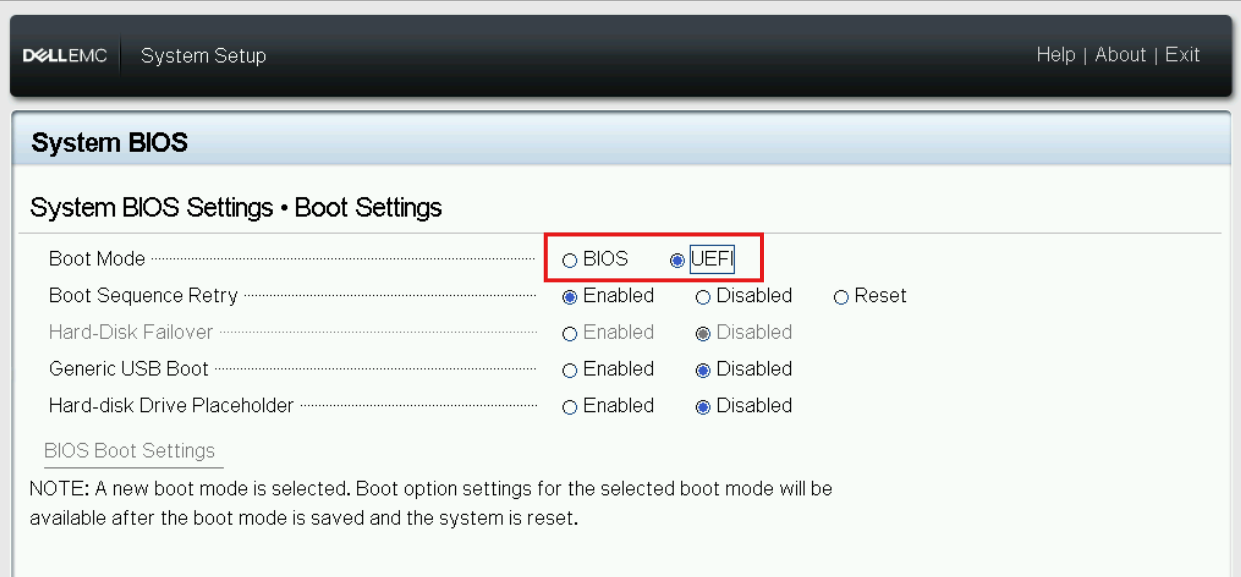
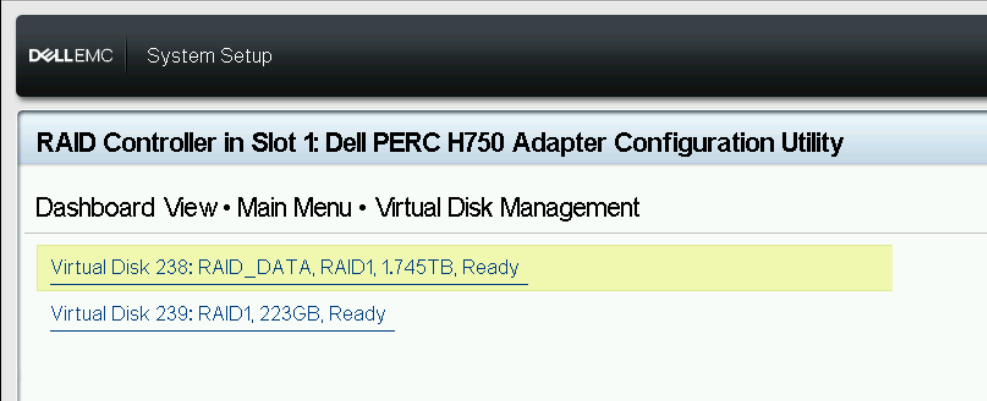
- Check the storage layout: the lab presents 2 RAID volumes
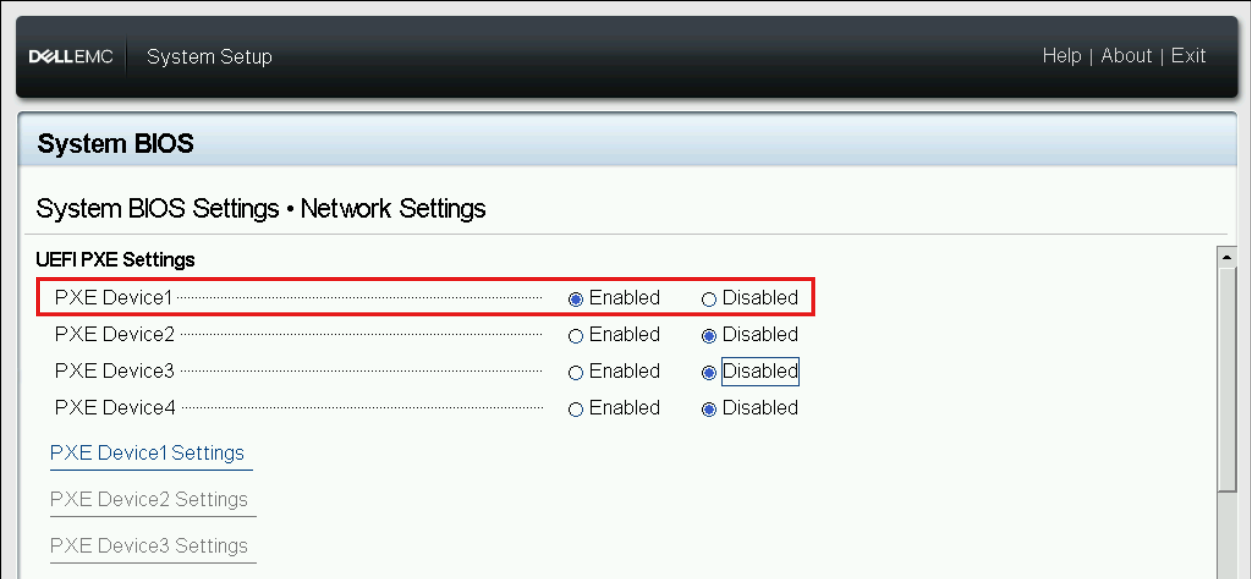
- Enable PXE boot on the management NIC
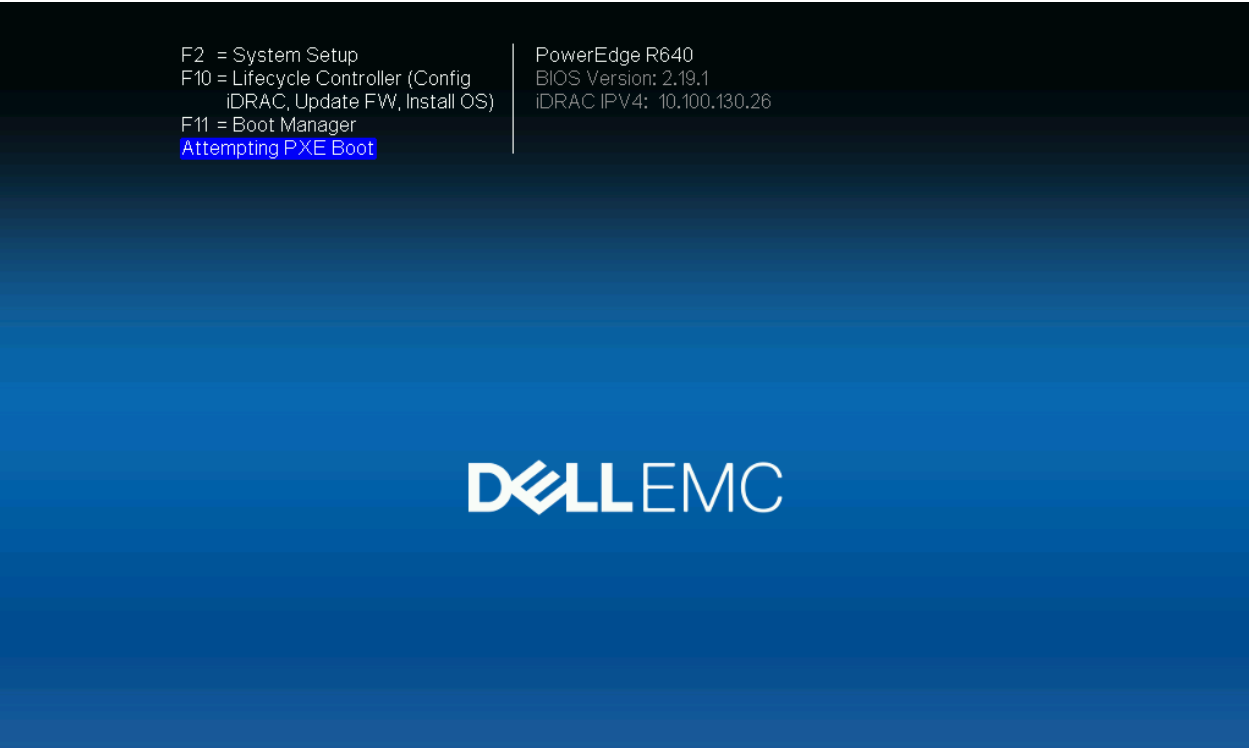
Reboot and pick PXE from the boot menu (F12 since we are talking about Dell).
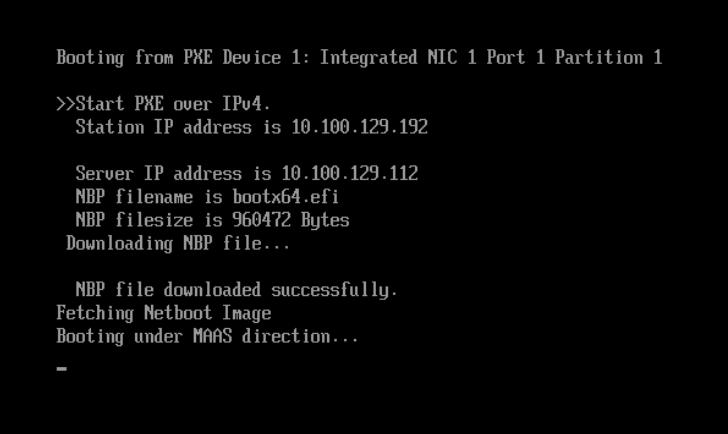
The server gets a temporary DHCP lease, boots the MAAS enlistment image, registers itself, powers off automatically, and appears in the Machines section.
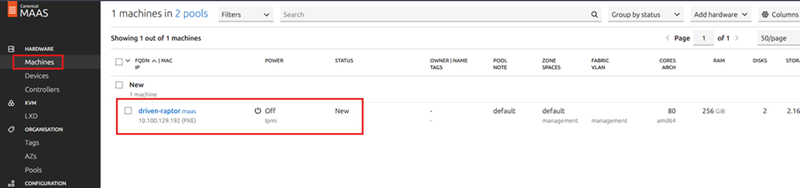
Enrich the machine in MAAS
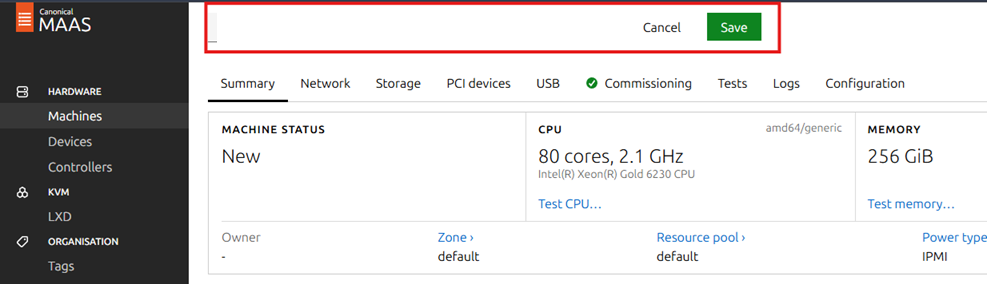
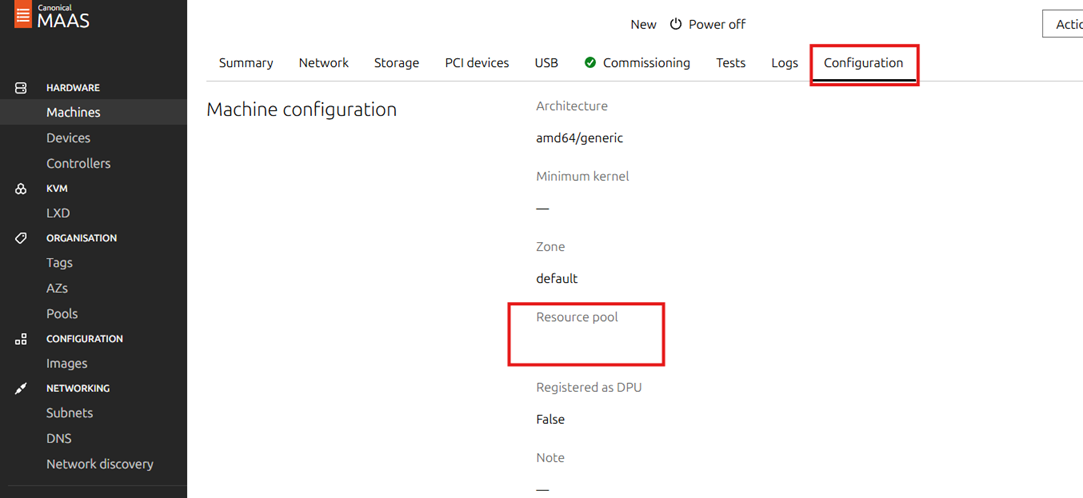
Select the machine → set a proper name and DNS domain, and assign it to the pool created earlier (Configuration tab).
Commissioning
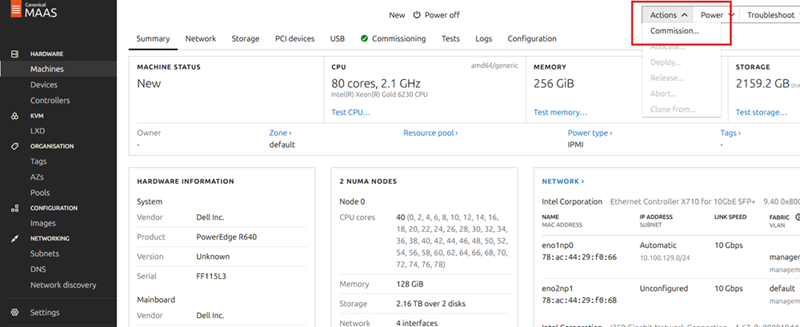
Commissioning is the diagnostic pass: MAAS powers the machine on, boots an ephemeral image, builds a full hardware profile (CPU, RAM, disks, NICs, BIOS details) and runs functional tests.
On success the machine lands in the Ready state.
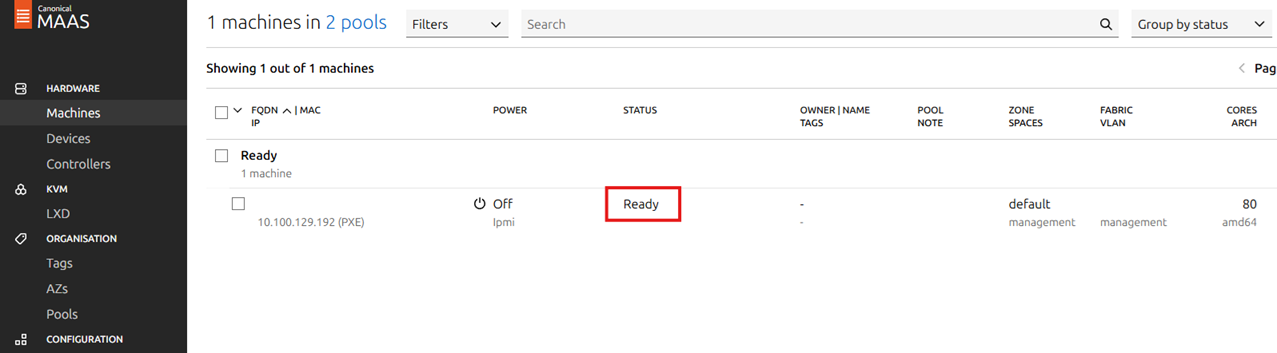
Network layout
The Network tab lists every NIC with link state (red = no carrier; connected ports show negotiated speed).
The lab server has two live 10 Gbps interfaces, eno1np0 and eno2np1.
Here you can build bonds, bridges, VLANs: the full production network layout, applied at deploy time.
The lab keeps it simple: static IP on eno1np0, second NIC left unconfigured.
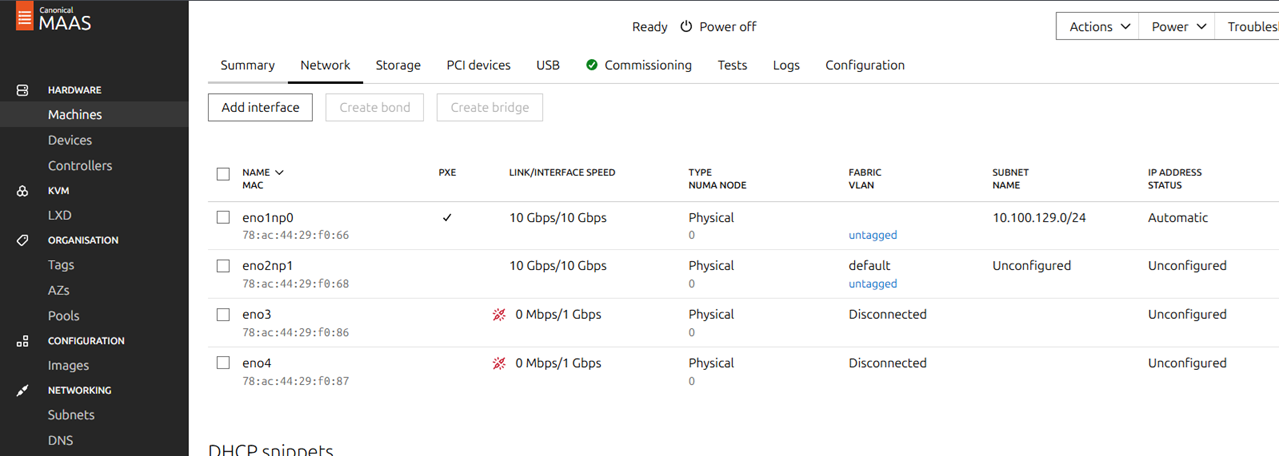
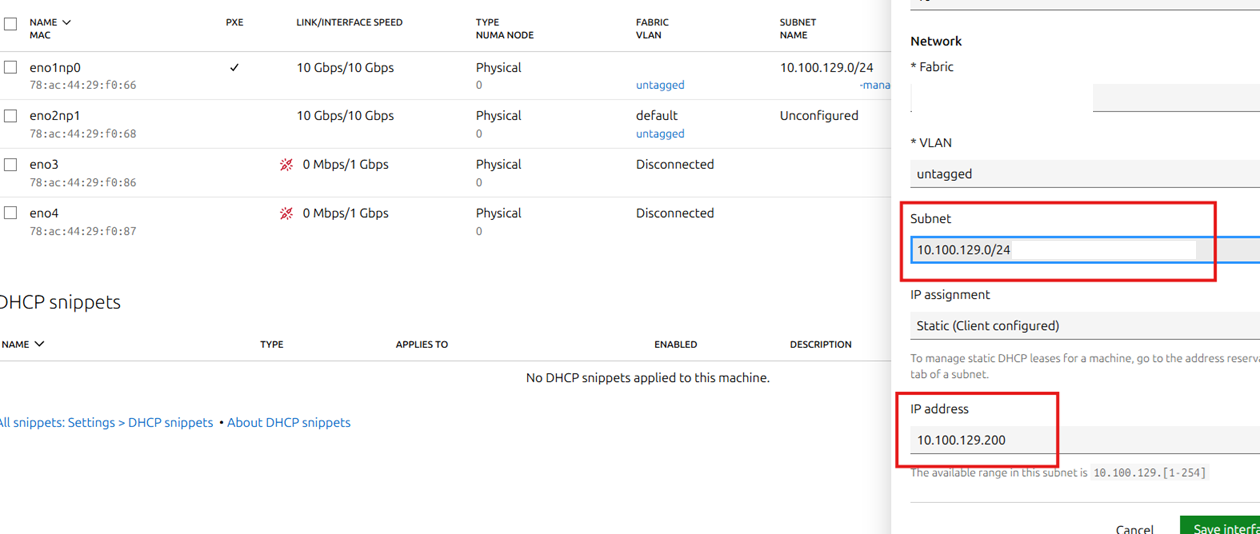
It should look something like this:

Storage layout
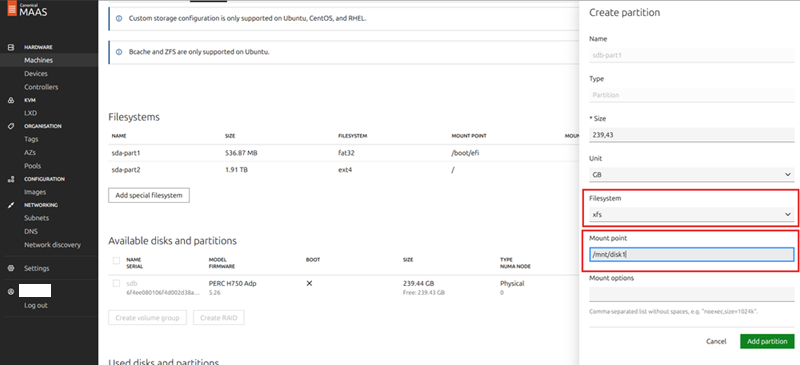
The two RAID volumes appear as two disks:
- Disk 1:
/boot/efi+ root (/) - Disk 2: formatted XFS, mounted at
/mnt/disk1
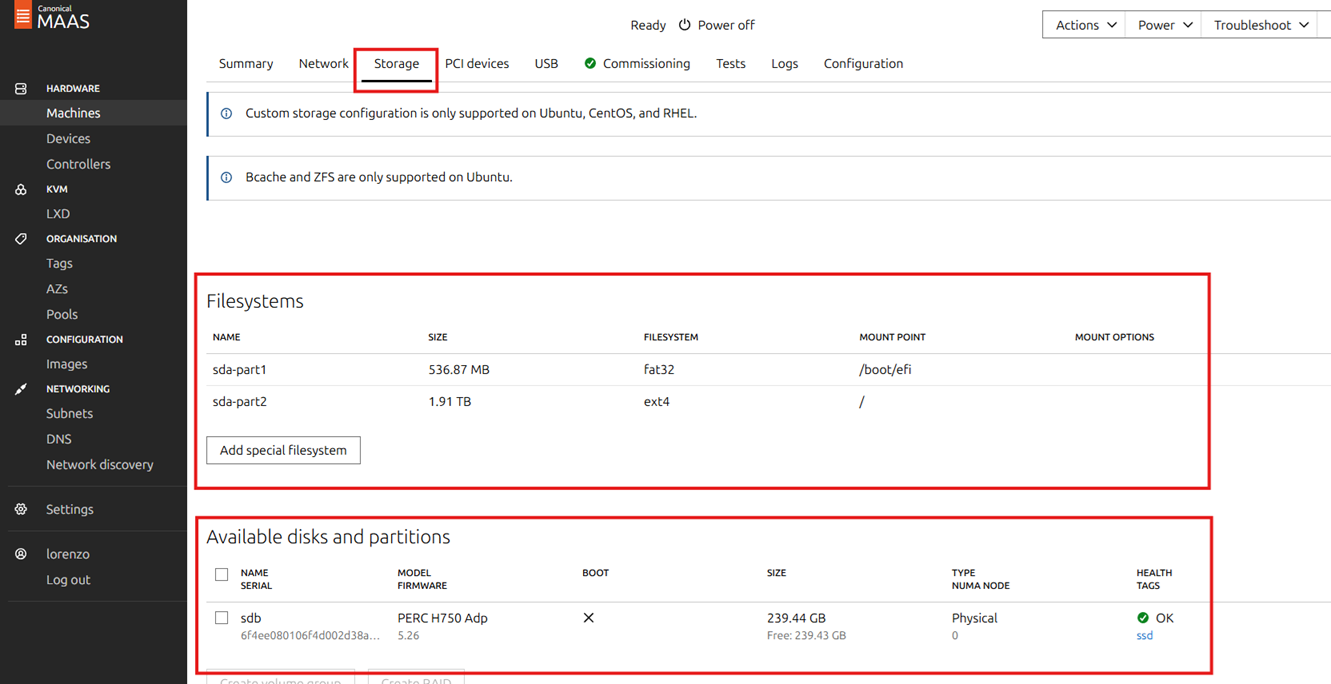
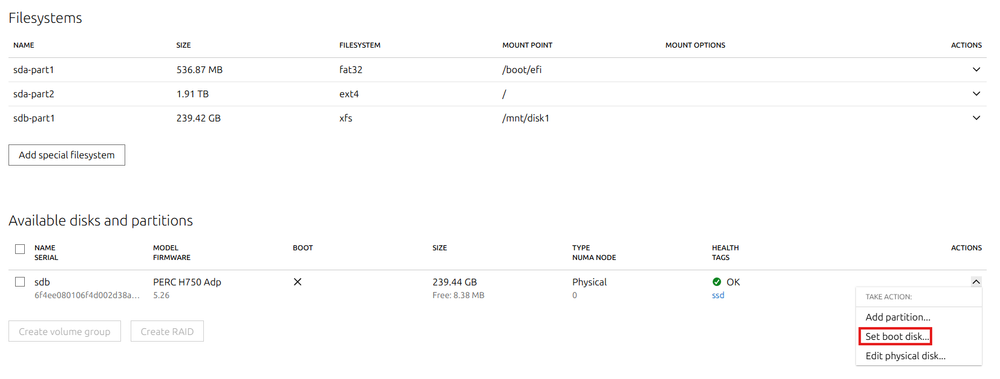
Verify the boot disk
Check which disk carries the boot flag: MAAS may auto-select the wrong one and happily install the OS on the wrong volume.
Fix it via “Set boot disk…” if needed.
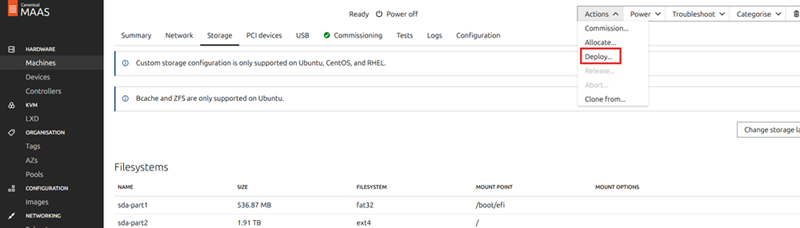
Deploy the OS
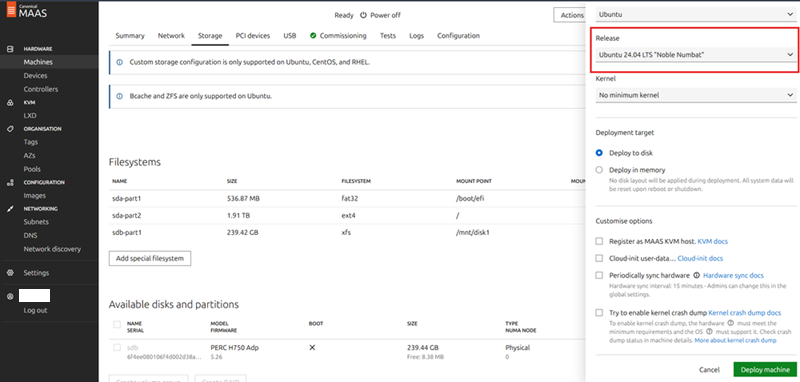
Everything is staged: hit Deploy, pick Ubuntu 24.04 LTS, confirm.
Note
The deploy can take several minutes: the actual duration depends on the bandwidth between MAAS and the target server (image transfer + install + first boot).
You can check the progress by connecting to the IPMI and watch the console.
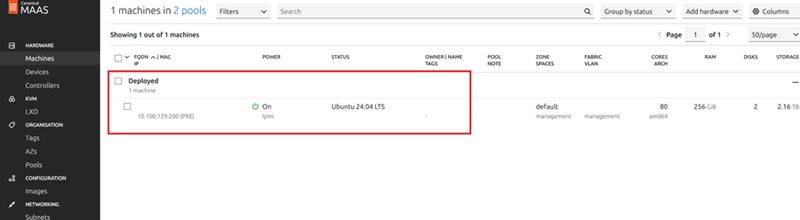
When it finishes, the machine shows Deployed.
Verify
SSH into the machine (with the key imported in Phase 2) and check that hostname, network layout and storage match what you configured in MAAS:
ssh ubuntu@<server-ip>
hostname --fqdn
ip -br a
lsblk -f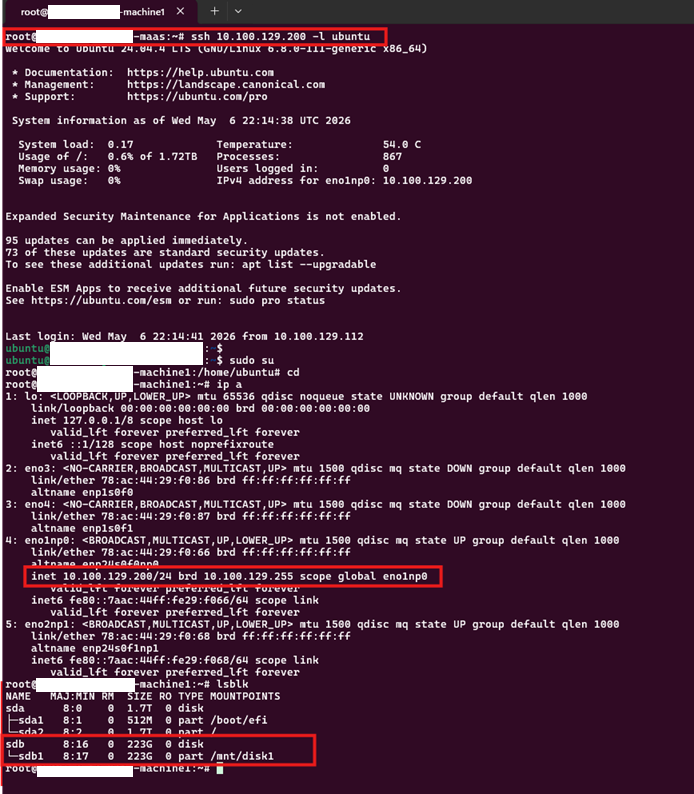
Closing thoughts
One server, provisioned end-to-end without ever mounting an ISO.
But the real value shows up at scale: the exact same flow runs in parallel on dozens of machines from one panel, with one consistent configuration.
What you gain:
- Time: no per-server manual installs
- Consistency: every machine deployed from the same recipe (goodbye snowflakes)
- Fewer human errors: disk layouts and network configs are declared once, applied by machine
- A cloud-like workflow on your own iron: ready machines are a pool you allocate on demand
Bare metal, minus the ceremony.