The Grafana Stack is the open-source ecosystem of tools maintained by Grafana Labs (and adjacent communities).
Each component in the stack is replaceable: you can put Prometheus where I have VictoriaMetrics, and Grafana will still visualize everything via datasources: the stack is famously modular, so pick what you need specifically.
Actually, the Grafana stack can cover every pillar for observability:
Metrics: node-exporter + VMAgent
Logs: Loki + Promtail
Traces: Tempo + OpenTelemetry
But in this wiki, I’ll show you how to use the Grafana stack only for metrics, while using the ELK stack only for logs. The goal is to showcase different technologies commonly used in production environments, including setups where responsibilities are split exactly this way.
Architecture
The whole stack consists in two machines that are on the same private LAN:
My VPS: I use it for publishing things on my domain, and in this case it is used for publishing Grafana, via nginx reverse-proxy with HTTPS.
A random VM named “vmagent”, used to scrape metrics from any other VM I want to monitor.
flowchart LR
    Visitor((🌍 visitor))

    subgraph LAN["🔒 Private LAN"]
        subgraph VPS["☁️ VPS — farnetiandrea.it"]
            NE[":9100<br/>node-exporter"]

            subgraph DC["~/observability/ (docker-compose)"]
                VM[":8428<br/>VictoriaMetrics"]
                Graf[":3000<br/>Grafana"]
            end

            Nginx["🔒 nginx + certbot"]
        end

        subgraph NewVM["☁️ vmagent01"]
            VMA[":8429<br/>VMAgent"]
        end
    end

    VMA -- "scrape" --> NE
    VMA -- "remote_write" --> VM
    Graf -- "PromQL" --> VM
    Visitor -- "/metrics" --> Nginx
    Nginx -- "proxy_pass :3001" --> Graf
Periodically pulls the /metrics page from each target (here: just the VPS node-exporter for now), then forwards the data to the storage backend via remote_write.
The dashboard frontend. Queries VictoriaMetrics, plots graphs, organizes dashboards. Exposed publicly via nginx reverse-proxy at farnetiandrea.it/metrics.
For deploying your Grafana Stack, we’ll follow this order:
node-exporter setup on every machine where you need metrics (in my case only my VPS): we have to curl localhost:9100/metrics and see the metrics.
VictoriaMetrics setup only in one dedicated machine (in my case on my VPS as a Docker container): we need to have a empty DB ready to receive data.
VMAgent setup (on the vmagent VM): it scrapes the metrics from the machines where we installed our node-exporter, and writes them to VictoriaMetrics.
Grafana dashboard setup only in one dedicated machine (in my case on my VPS as a Docker container), exposed at /metrics.
Why using two machines instead of “all in one”?
A single VPS with node-exporter + VMAgent + VictoriaMetrics + Grafana is totally doable and would work for a homelab, but separating the scraper onto a different host is the realistic pattern you’ll find in any company with more than a couple of servers:
The scraper (VMAgent) is the only piece that needs network access to every monitored target, so putting it on a dedicated, minimal VM makes the security perimeter small and clear.
Any other machine just needs to expose metrics, so that the scraper can harvest them.
Of course, the VictoriaMetrics database and the Grafana dashboard could also have been separated onto different machines, but that part is relatively trivial to understand.
Actually, if your company uses Kubernetes, there’s a dedicated VictoriaMetrics Operator that can be used to easily scale the infrastructure, especially the VMAgent scrapers (and much more).
The scraper layer, in fact, becomes essential once you start dealing with infrastructures of 2000+ machines: you need multiple dedicated scraper nodes to distribute the workload properly. That’s why I wanted to separate it here as well, to better distinguish its role and to show you how a scalable infrastructure is typically designed.
Deployment
Here’s the whole deployment (installation + configuration of each component) from start to finish.
1. Node-exporter setup
Here we are, ready to configure our node-exporter in any VM where we need metrics.
Super simple.
First thing first, we insall it:
1. Installation (Ubuntu/Debian)
apt updateapt install prometheus-node-exporter
The package:
Installs the binary /usr/bin/prometheus-node-exporter.
Creates a systemd unit prometheus-node-exporter.service, enabled and started by default.
Listens on 0.0.0.0:9100 by default (that’s a problem, but we’ll fix it in the hardening section).
And to conclude, we harden everything by binding the service to our private LAN, then we restrict access even more by configuring our firewall accordingly:
3. Hardening
By default node-exporter listens on all interfaces (0.0.0.0:9100).
On a server with a public IP, that means anyone on the Internet can do curl http://<your-public-ip>:9100/metrics and read:
All your mount points and disk usage
All your network interfaces and IPs
All your running processes (if the --collector.processes flag is enabled)
Last reboot time, uptime, hardware info, kernel version
That’s a leak.
Two complementary fixes: apply both for defense in depth.
1. Binding to LAN only
Edit the package defaults file:
nano /etc/default/prometheus-node-exporter
Change the ARGS line to bind to the VPS’s private LAN IP:
ARGS="--web.listen-address=<VPS_PRIVATE_IP>:9100"
Then restart:
systemctl restart prometheus-node-exporter
Verify the listen address has changed:
ss -tlnp | grep 9100
You should now see node-exporter bound only to the private IP (e.g. 10.0.0.5:9100), not 0.0.0.0:9100.
From the public interface, port 9100 is now invisible.
2. Firewall rule
Even with the bind restricted, add an explicit firewall rule so that if the bind config ever drifts (you remove the flag, package update overwrites it…) the leak doesn’t reappear.
With iptables (typical Ubuntu server setup, persisted by netfilter-persistent):
# Allow scrape from the LAN (vmagent01) — adjust to your scraper's IPiptables -A INPUT -p tcp --dport 9100 -s <VMAGENT01_PRIVATE_IP> -j ACCEPT# Drop from anywhere else (your default INPUT policy should already be DROP,# this is an explicit safety net)iptables -A INPUT -p tcp --dport 9100 -j DROP# Persist the rule across rebootsnetfilter-persistent save
After this, only your vmagent (via its LAN IP) can reach :9100.
This step is not optional. VictoriaMetrics runs as UID 1000 inside the container (forced by the user: "1000:1000" directive in our compose file). If the bind-mount directory belongs to anyone else (root, your own user with a UID different from 1000…) the container can’t write the lock file at startup and crashes with cannot create lock file ... permission denied.
sudo chown -R 1000:1000 victoriametrics-data
3. The docker-compose.yml
Create ~/observability/docker-compose.yml with this content:
services: victoriametrics: image: victoriametrics/victoria-metrics:v1.107.0 container_name: victoriametrics restart: unless-stopped user: "1000:1000" ports: # Bind to the VPS private LAN IP only — NOT 0.0.0.0. # This makes :8428 reachable from vmagent but invisible from the public Internet. - "<VPS_PRIVATE_IP>:8428:8428" volumes: - ./victoriametrics-data:/storage command: - "-storageDataPath=/storage" - "-retentionPeriod=1" # months — adjust as needed (e.g. 12 for one year) - "-httpListenAddr=:8428" healthcheck: test: ["CMD", "wget", "--quiet", "--tries=1", "--spider", "http://localhost:8428/health"] interval: 30s timeout: 3s retries: 3networks: default: name: observability
A few details that matter:
-retentionPeriod=1 is months (the default). Start with 1, raise to 6 or 12 when you know the disk usage. On a small VPS with 2 targets and standard scrape interval, expect 30-50 MB/month.
networks.default.name: observability creates a named bridge network. When we add Grafana to this compose file later, it’ll be on the same network and reach VM via DNS name victoriametrics:8428 (no port mapping needed for that).
The version tag (v1.107.0) is pinned. Never use :latest for any long-running service: upgrades go through your patch management procedure, not silently on container restart.
4. Start it up
cd ~/observabilitydocker compose up -d
Verify it’s running:
docker compose ps
If it’s not healthy, check the logs:
docker compose logs victoriametrics --tail=50
The two most common failures:
permission denied on /storage: you skipped the chown in step 2.
Port already in use: something else is on :8428 on the VPS, so change the host-side port.
5. Persistence
Where does the data live?
With this configuration, everything VictoriaMetrics writes goes to ~/observability/victoriametrics-data/ on the VPS host (the bind-mount).
This means:
docker compose down doesn’t delete data.
docker compose down -v doesn’t delete data (named volumes aren’t used).
rm -rf ~/observability/victoriametrics-data/does delete data: be careful.
Backups are a regular file backup of that directory.
To take a consistent backup, VM supports a snapshot API:
curl http://<VPS_PRIVATE_IP>:8428/snapshot/create# Returns the snapshot name, then tar that subfolder of ./victoriametrics-data
Of course more interesting configurations can be done: bind-mount is the simplest option, but -storageDataPath can point at any mounted filesystem, for example:
NFS: easy to set up, survives the VPS dying, but its slower than local disk on writes.
Ceph RBD: distributed block storage, both fault-tolerant and high-throughput.
# Health endpointcurl http://<VPS_PRIVATE_IP>:8428/health# Expected: "OK"# Self-metrics (VM exposes its own metrics for monitoring itself — meta!)curl -s http://<VPS_PRIVATE_IP>:8428/metrics | head -20
From the wider Internet (your laptop, your phone on mobile data):
And to conclude, we can do some iptables hardening for Docker (pretty interesting to see):
3. Hardening
We already did application-level hardening when we created our docker-compose.yml: the ports: "<VPS_PRIVATE_IP>:8428:8428" bind already protects you from the public Internet.
Now, we could do some network hardening via iptables, like we did with our node-exporter… but this time its different, since VictoriaMetrics is a Docker container.
Actually, Docker doesn’t open :8428 on the public IP at all.
But if we want to look from the private LAN perspective, any other host could theoretically reach VictoriaMetrics and write (or read) metrics. So for defense in depth, we can add an explicit firewall rule allowing only our vmagent to talk to :8428.
Explanation
For native services like node-exporter, you’d write a rule in the INPUT chain:
iptables -A INPUT -p tcp --dport 9100 -s <VMAGENT_PRIVATE_IP> -j ACCEPTiptables -A INPUT -p tcp --dport 9100 -j DROP
This works because the kernel processes INPUT for traffic destined to local services on the host.
For Docker containers, this doesn’t work. Docker uses DNAT in the nat table to redirect traffic from the published port (8428 on the host) to the container’s internal IP.
The packets are processed in the FORWARD chain (not INPUT), and Docker installs its own rules in custom chains called DOCKER and DOCKER-USER.
An iptables -A INPUT -j DROP rule, for example, will not stop traffic from reaching the container, because that traffic never traverses INPUT in the first place.
The right place to filter is DOCKER-USER: a chain that Docker provides specifically for user-defined rules that run before its automatic forwarding rules.
Add the rule
# Allow scrape and write traffic from vmagent onlyiptables -I DOCKER-USER -p tcp --dport 8428 -s <VMAGENT_PRIVATE_IP> -j ACCEPT# Drop everything else trying to reach :8428iptables -I DOCKER-USER -p tcp --dport 8428 -j DROP# IMPORTANT: order matters. -I (insert) places rules at the TOP of the chain,# so the ACCEPT must be inserted AFTER the DROP in command order — that way# the ACCEPT ends up above the DROP in the chain. Verify with:iptables -nvL DOCKER-USER
Expected output (the order is what matters: ACCEPT from vmagent first, DROP everything else second):
cd /tmpVM_VERSION=v1.107.0wget "https://github.com/VictoriaMetrics/VictoriaMetrics/releases/download/${VM_VERSION}/vmutils-linux-amd64-${VM_VERSION}.tar.gz"tar -xzf "vmutils-linux-amd64-${VM_VERSION}.tar.gz"
The tarball contains several tools (vmagent-prod, vmctl-prod, vmalert-prod, vmauth-prod, vmbackup-prod, vmrestore-prod), but we only need the first one:
scrape_interval: 15s: every 15 seconds, hit every target. Lower interval = higher resolution but more disk usage. 15s is the de-facto standard.
external_labels: { cluster: 'home' }: attached to every metric sent by this agent. Useful when you have multiple environments writing to the same VictoriaMetrics (e.g. cluster: 'prod', cluster: 'staging'). For now, just a placeholder.
job_name: 'node': a logical grouping. Every metric scraped from these targets will carry job="node" as label. Standard convention for node-exporter targets.
labels: { host: 'vps-personaldomain' }: per-target labels. They get attached to every metric from that specific target. Useful for distinguishing servers.
This config will grow as you add targets.
4. Create the systemd unit
sudo nano /etc/systemd/system/vmagent.service
Paste (replace <VPS_PRIVATE_IP> in the -remoteWrite.url line):
Why hardcoding the flags in the systemd unit instead of putting everything in the YAML?
There’s a deliberate separation between two kinds of configuration:
Infrastructure flags (CLI args in the systemd unit): “where do I send data?”, “where do I buffer?”, “which port for my debug UI?“. These change very rarely: only when you fundamentally restructure your infrastructure.
Scrape configuration (the YAML file): “which targets do I scrape?”, “with what interval?”, “with what labels?“. These change often, every time the fleet grows or shrinks.
5. Enable and start
sudo systemctl daemon-reloadsudo systemctl enable --now vmagentsudo systemctl status vmagent
Expected: Active: active (running). If not, immediately:
And now it the last thing to do is verify that we did everything right:
2. Validation
Three layers of verification, from “VMAgent is happy” to “data made it to the DB”.
1. VMAgent itself
curl -s http://127.0.0.1:8429/metrics | head -10# Expected: VMAgent's own self-metrics (vm_app_uptime_seconds, etc.)curl -s http://127.0.0.1:8429/targets# Expected: HTML page listing the target <VPS_PRIVATE_IP>:9100 with state "up"
The /targets endpoint is the most useful debug page: it tells you which targets are being scraped, when the last scrape was, how many samples it collected, and the exact error if it’s failing.
2. Network reachability
Can VMAgent reach both endpoints? From vmagent:
# Reach the scrape target (node-exporter on the VPS)curl -sf http://<VPS_PRIVATE_IP>:9100/metrics | head -3# Expected: # HELP ... # TYPE ... etc.# Reach the remote_write endpoint (VictoriaMetrics on the VPS)curl -sf http://<VPS_PRIVATE_IP>:8428/health# Expected: OK
If either of these fails, the scrape job in /targets will show “down” with the connection error: fix the network first, the rest will work automatically.
3. Data in VictoriaMetrics
From the VPS (or from anywhere with access to VictoriaMetrics):
Not optional. Grafana inside the container runs as UID 472 (a Grafana-specific user, not 1000 like VictoriaMetrics). Without this chown, the container crashes with messages like mkdir: cannot create directory '/var/lib/grafana/plugins': Permission denied.
sudo chown -R 472:472 grafana-data
3. Pick a free host port
Grafana inside the container listens on 3000, but on the host you can map it to any port you want. First check that the chosen host port is free, because 3000 is one of the most common defaults on Linux servers (Node.js apps, other dashboards, …):
ss -tlnp | grep -E ':(3000|3001)\s'
If you get no output, port 3000 is free → use 3000 in the compose file.
If something is listening on 3000, pick the next free one (3001, 3030, whatever). Make sure you adjust both the compose ports: line and the nginx proxy_pass accordingly.
For the rest of this page I’ll use 3001 because in my setup 3000 is taken by another app.
4. Add Grafana to the existing docker-compose.yml
Edit ~/observability/docker-compose.yml and add the grafana: service to the existing services: block.
127.0.0.1:3001:3000 — Grafana listens only on the VPS’s loopback interface. Nginx will proxy to it.
GF_SERVER_ROOT_URL and GF_SERVER_SERVE_FROM_SUB_PATH=true — together, they tell Grafana “you live at the path /metrics, generate all internal URLs and redirects accordingly”. Without these, the login form, API calls and static assets all break.
GF_SECURITY_ADMIN_PASSWORD is a placeholder. Change it before starting, or change it via web UI on first login.
5. Start Grafana
docker compose up -ddocker compose ps
Expected: both victoriametrics and grafana in running state.
If not, you can check logs as always:
docker compose logs grafana --tail=30
Quick test from the VPS itself (Grafana is on localhost:3001):
If so, the only thing left to do is the initial configuration:
3. Grafana configuration
Configure the VictoriaMetrics datasource
In the Grafana UI:
Left sidebar → Connections → Data sources → Add data source.
Search and pick Prometheus (yes, Prometheus: I’ll explain why in a minute).
Fill in:
Name: prometheus (or VictoriaMetrics, whatever you prefer, it’s just a label).
URL: http://victoriametrics:8428 (Docker DNS: both containers are on the observability network, they resolve each other by service name).
Access: leave as Server (default).
Everything else: defaults.
Click Save & test at the bottom.
Expected: green banner “Successfully queried the Prometheus API”.
INFO
Why “Prometheus” and not the dedicated “VictoriaMetrics” datasource plugin?
VictoriaMetrics is API-compatible with Prometheus: Grafana’s built-in Prometheus connector speaks to it natively, no plugin needed. There exists a separate VictoriaMetrics datasource plugin that adds VM-specific features, but for standard observability with PromQL, the built-in Prometheus datasource is:
More portable: if you swap DB tomorrow, dashboards probably will keep working.
The community standard: every pre-made dashboard on grafana.com/dashboards expects the Prometheus datasource type as a parameter.
Our first query
Left sidebar → Explore → make sure the datasource at the top is the one you configured.
Type:
up
And click Run query. It should answer.
Great! we’ve finished! Time to build real dashboards now!
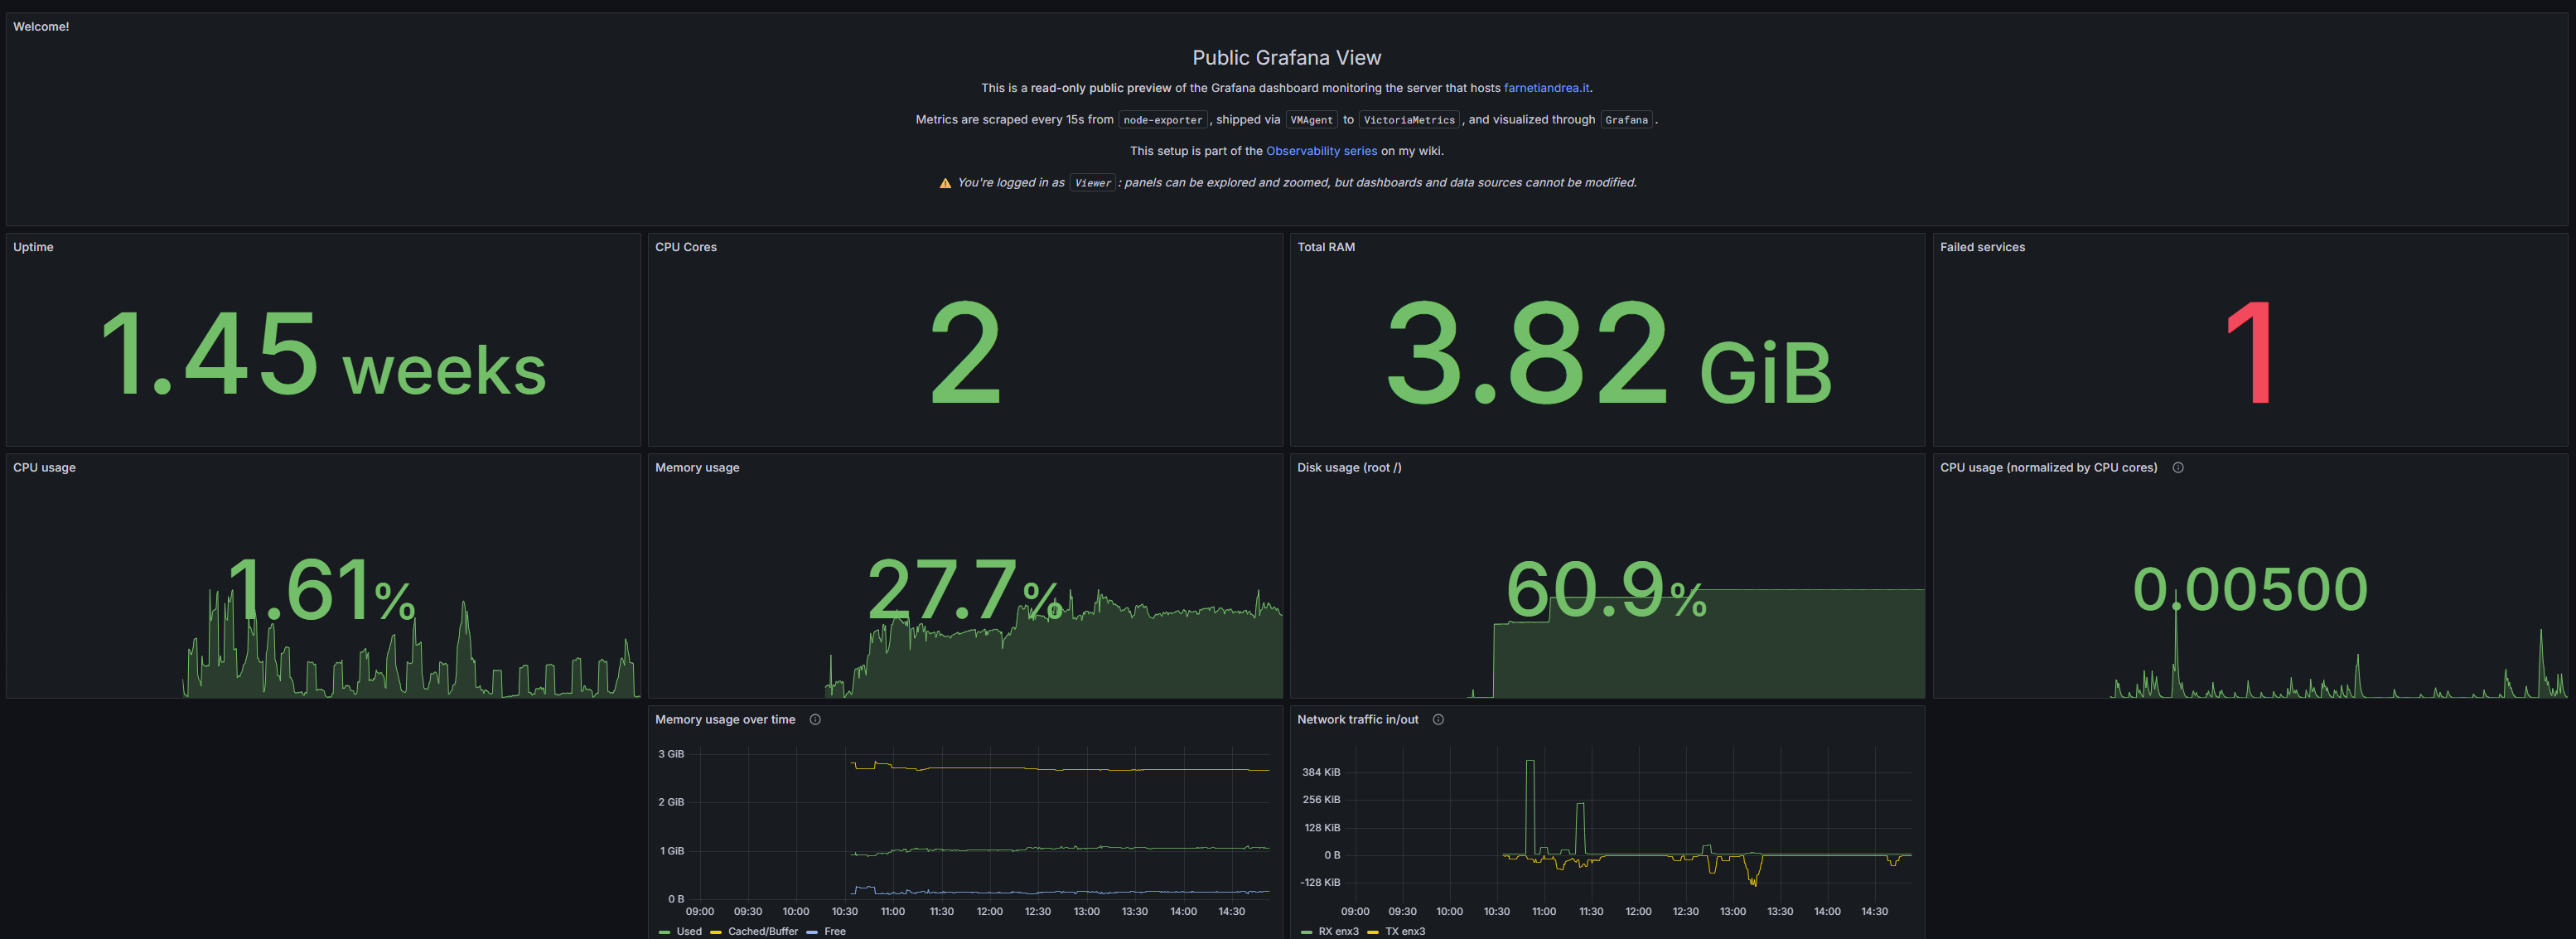
If you want to share your dashboards publicly as a read-only showcase (just like my https://farnetiandrea.it/metrics/, anybody can see them without an account), Grafana has a native anonymous viewer mode.
The anonymous user gets the Viewer role: can browse and zoom into any panel, but cannot edit, delete, change datasources, or access admin pages.
You (the real admin) can still log in via the “Sign in” button in the top-right corner.
You just need to add these four env vars to the grafana: service in your docker-compose.yml:
    environment:
      # ... your existing vars ...
      - GF_AUTH_ANONYMOUS_ENABLED=true
      - GF_AUTH_ANONYMOUS_ORG_NAME=Main Org.
      - GF_AUTH_ANONYMOUS_ORG_ROLE=Viewer
      - GF_AUTH_ANONYMOUS_HIDE_VERSION=true
And to restart Grafana:
docker compose up -d grafana
You can test in an incognito browser window (no cookies), and you should land directly on the Grafana home dashboard without login prompt.
We have successfully deployed a complete, simple yet solid Grafana stack, congratulations!
The only thing left to do now is personalize it with your dashboards. If you don’t know how to do that, I wrote a guide to help you take your first steps with Grafana.
Check it out and start monitoring!
What to do next
Great, you’ve successfully implemented a working metrics system… but do you have a logs system as well?
If the answer is no well, you’ve got a new project to work on!

 https://farnetiandrea.it/metrics