The ELK Stack is the open-source ecosystem for centralised logging, maintained by Elastic and the broader community.
The acronym covers three components:
E: Elasticsearch: a distributed search engine + document database optimised for logs and time-series text events.
L: Logstash: an event-processing pipeline (input → filter → output).
K: Kibana: the web UI that queries Elasticsearch and renders dashboards.
In modern deployments a fourth piece is almost always added: Filebeat, the lightweight log shipper that lives on every source machine and pushes events into the pipeline. The combination is sometimes called the Elastic Stack to underline that Beats are first-class citizens, not an add-on.
All traffic between the VPS and the 4 VMs runs on a private LAN: the VMs have no public ports exposed.
The stack I use
Role
Tool
Where it runs
What it does
Log shipper
Filebeat
on the VPS (native)
reads /var/log/*, journalctl, Docker logs; ships to the HAProxy VIP on :5044
Load-balancing
HAProxy + Keepalived
lb01 + lb02 (HA pair)
active/standby VIP, TCP-mode load balance to the Logstash pool
Parsing pipeline
Logstash
logstash01 + logstash02 (Docker)
parses, enriches, and ships parsed events to Elasticsearch
Storage + search
Elasticsearch
on the VPS (Docker)
indexes events, runs queries, retains data with ILM policy
Visualisation
Kibana
on the VPS (Docker)
UI for Discover / Visualize / Dashboard; exposed publicly via nginx on /logs/
Why this topology?
Because it mirrors a real, scalable, enterprise pattern for production.
The three layers each solve one specific problem:
HAProxy + Keepalived HA pair: smooths traffic spikes, hides individual Logstash nodes from the shippers, lets you do rolling upgrades / restarts on Logstash without losing events, and isolates failures (a crashed LS doesn’t affect Filebeat).
Multiple Logstash workers: parsing is CPU-heavy. Two identical workers double the throughput, and if one dies the load balancer just stops sending events to it.
Single Elasticsearch: this is the only simplification, but it can work fine like this for most cases.
Note
This series walks the components in deploy order, which for a push-based pipeline like ELK runs opposite to the data flow: the consumer side has to exist before the producer has anywhere to push to!
Deployment
Here’s the whole deployment (installation + configuration of each component) from start to finish.
1. Elasticsearch setup
We start from the storage layer: without Elasticsearch nothing downstream has a place to land.
A single-node container on the VPS, persistent storage on a bind-mounted volume, daily logs-* indices rotated by ILM.
Then the kernel tweak that ElasticSearch requires and the data directory layout:
Kernel settings
IMPORTANT
Elasticsearch uses memory-mapped files heavily and refuses to start if vm.max_map_count < 262144.
This must be set on the host, not in the container.
# Apply nowsudo sysctl -w vm.max_map_count=262144# Make it persist across rebootsecho 'vm.max_map_count=262144' | sudo tee /etc/sysctl.d/99-elasticsearch.conf
We generate the elastic superuser password and write the compose file:
Generate the elastic superuser password
WARNING
Use hex-only passwords. Special characters like ! and $ are interpreted by bash!
echo "ELASTIC=$(openssl rand -hex 24)"
Copy the hex value into your password manager now (What? You don’t have one? Check this out immediately!) then write it into the .env using EOF (the quotes around 'EOF' stop bash from interpreting anything inside):
sudo tee /opt/observability-logs/.env > /dev/null <<'EOF'ELASTIC_PASSWORD=<paste hex value here>EOFsudo chmod 600 /opt/observability-logs/.env
services: elasticsearch: image: docker.elastic.co/elasticsearch/elasticsearch:8.15.0 container_name: elasticsearch user: "1000:1000" environment: - discovery.type=single-node - ES_JAVA_OPTS=-Xms2g -Xmx2g - bootstrap.memory_lock=true # Security ON, but TLS OFF on the HTTP layer. # Lab simplification: traffic stays on the private LAN. # In production this is non-negotiable — enable HTTPS. - xpack.security.enabled=true - xpack.security.http.ssl.enabled=false - xpack.security.transport.ssl.enabled=false - xpack.security.enrollment.enabled=false # Pre-set the password of the built-in `elastic` superuser so we don't # have to fish it out of the first-boot logs. - ELASTIC_PASSWORD=${ELASTIC_PASSWORD} ulimits: memlock: { soft: -1, hard: -1 } nofile: { soft: 65536, hard: 65536 } volumes: - /opt/observability-logs/es-data:/usr/share/elasticsearch/data ports: # Private LAN IP — for Logstash workers on dedicated VMs - "10.0.0.5:9200:9200" # Localhost — for Kibana (same host) and quick curl checks - "127.0.0.1:9200:9200" networks: - elk-net restart: unless-stopped healthcheck: test: ["CMD-SHELL", "curl -fsS -u elastic:${ELASTIC_PASSWORD} http://localhost:9200/_cluster/health || exit 1"] interval: 30s timeout: 5s retries: 5networks: elk-net: driver: bridge
A few choices worth calling out:
bootstrap.memory_lock=true + ulimits.memlock: -1 pins ElasticSearch JVM memory into RAM so it can’t be swapped out. ES strongly discourages swapping (latency spikes); locking memory is the cleanest fix.
ES_JAVA_OPTS=-Xms2g -Xmx2g sets both min and max heap to 2 GB. Min == Max is best practice for the JVM. Any real log workload needs 2 GB+ to avoid hitting the parent circuit breaker.
xpack.security.http.ssl.enabled=false keeps the HTTP API on plain HTTP. The private LAN is trusted in this lab, and 9200 is never publicly exposed. In a production cluster (or anywhere outside a trusted network), enable HTTP TLS.
Two ports lines bind the same container port to two distinct host addresses: the private LAN IP and 127.0.0.1. This makes 9200 reachable to Logstash workers (over the private LAN), and to Kibana / local curl (over localhost), but nothing else on the public internet sees it.
Yellow is fine here. It means primary shards are allocated but replicas can’t be (single-node can’t host replicas of its own data: that would defeat the point).
kibana_system password: Kibana authenticates to ES with this built-in service user. It exists in ElasticSearch from day one, but starts with an empty / random password.
Encryption key: Kibana encrypts certain saved objects (alerts, reports, connectors). If you don’t set a persistent key, Kibana picks a random one at every restart and previously-encrypted saved objects become unreadable.
sudo tee -a /opt/observability-logs/.env > /dev/null <<'EOF'KIBANA_SYSTEM_PASSWORD=<paste hex value here>KIBANA_ENCRYPTION_KEY=<paste hex value here>EOF
Append the Kibana service to /opt/observability-logs/docker-compose.yml, next to the existing Elasticsearch service:
Example: my docker-compose (kibana service)
  kibana:
    image: docker.elastic.co/kibana/kibana:8.15.0
    container_name: kibana
    user: "1000:1000"
    depends_on:
      elasticsearch:
        condition: service_healthy
    environment:
      - ELASTICSEARCH_HOSTS=http://elasticsearch:9200
      # Kibana authenticates to ES with the built-in kibana_system user
      - ELASTICSEARCH_USERNAME=kibana_system
      - ELASTICSEARCH_PASSWORD=${KIBANA_SYSTEM_PASSWORD}
      # Sub-path config — Kibana is served under farnetiandrea.it/logs
      - SERVER_BASEPATH=/logs
      - SERVER_REWRITEBASEPATH=true
      - SERVER_PUBLICBASEURL=https://farnetiandrea.it/logs
      - TELEMETRY_OPTIN=false
      # Persistent key for saved-object encryption (no random key per restart)
      - XPACK_ENCRYPTEDSAVEDOBJECTS_ENCRYPTIONKEY=${KIBANA_ENCRYPTION_KEY}
    volumes:
      - /opt/observability-logs/kibana-data:/usr/share/kibana/data
    ports:
      # Localhost only — nginx proxies to this port
      - "127.0.0.1:5601:5601"
    networks:
      - elk-net
    restart: unless-stopped
    healthcheck:
      test: ["CMD-SHELL", "curl -fsS http://localhost:5601/logs/api/status || exit 1"]
      interval: 30s
      timeout: 5s
      retries: 5
A few notes on the choices:
SERVER_BASEPATH=/logs + SERVER_REWRITEBASEPATH=true: Kibana itself handles the /logs prefix on every URL it emits and accepts. The reverse-proxy does not strip the prefix, it passes the path through unchanged.
SERVER_PUBLICBASEURL=https://farnetiandrea.it/logs: used when generating absolute URLs (sharing links, email reports, etc.). Must match the public URL exactly.
127.0.0.1:5601 binding: Kibana is reachable only from the same host, then the internet talks to nginx, and nginx talks to localhost.
depends_on: elasticsearch: condition: service_healthy: Kibana refuses to start cleanly if ES isn’t ready. Waiting for service_healthy (not just service_started) avoids the restart loop.
Expose it publicly via nginx and verify the login screen loads:
5. Nginx reverse-proxy at /logs/
Add a location /logs/ block to your existing virtual host in Nginx.
My config file lives at /etc/nginx/sites-available/farnetiandrea.it:
Example: my nginx config (Kibana location block)
# Kibana (ELK Stack) at /logs/location /logs/ { # No trailing slash on proxy_pass: keep /logs in the request. # Kibana strips it internally because SERVER_REWRITEBASEPATH=true. proxy_pass http://127.0.0.1:5601; proxy_set_header Host $host; proxy_set_header X-Real-IP $remote_addr; proxy_set_header X-Forwarded-For $proxy_add_x_forwarded_for; proxy_set_header X-Forwarded-Proto $scheme; # Kibana uses WebSockets for live updates and Discover tail proxy_http_version 1.1; proxy_set_header Upgrade $http_upgrade; proxy_set_header Connection "upgrade"; # Discover queries and dashboard panels can be slow on big indices proxy_read_timeout 90s; proxy_send_timeout 90s;}
INFO
No trailing slash on proxy_pass (http://127.0.0.1:5601;, not http://127.0.0.1:5601/;).
With a trailing slash, nginx strips the matched prefix /logs/ before forwarding, but Kibana expects to see /logs/ because we set SERVER_REWRITEBASEPATH=true.
Without the trailing slash, nginx passes the full URI through and Kibana handles the prefix itself.
If you want visitors to land directly on Discover without a login (the same flow as farnetiandrea.it/logs), layer the viewer-mode on top of the base Kibana deploy.
The full walkthrough lives on its own page.
Three moving parts:
A least-privilege ElasticSearch role
An anonymous ElasticSearch user
An anonymous auth provider in kibana.yml.
It can be done now or after the rest of the series, doesn’t matter.
3. Logstash setup
Now we add the parsing layer.
Two identical Docker workers (logstash01 at 10.0.0.21, logstash02 at 10.0.0.22) on dedicated VMs on the private LAN, each writing to the central Elasticsearch with a least-privilege user (logstash_writer).
They’re peers, not primary/secondary: running two gives us horizontal capacity and fault isolation.
Then from the VPS, create the dedicated ES user so a compromised worker can only append to logs-* and nothing else:
2. Generate the logstash_writer password on the VPS
The workers don’t need ES superuser.
We’ll create a dedicated logstash_writer user, with a role scoped to writing into our log indices and nothing else.
First, generate the password on the VPS, and append it to the central .env:
# On the VPS, /opt/observability-logs/echo "LOGSTASH_WRITER=$(openssl rand -hex 24)"sudo tee -a /opt/observability-logs/.env > /dev/null <<'EOF'LOGSTASH_WRITER_PASSWORD=<paste hex value here>EOF
http.host: 0.0.0.0 is required so the monitoring API on :9600 is reachable from outside the container (used by the healthcheck and by future Prometheus scraping).
# /opt/observability-logs/pipeline/main.confinput { beats { port => 5044 client_inactivity_timeout => 3600 }}filter { # Per-event parsing / enrichment goes here. Keep empty for the first # end-to-end test; add grok / mutate / date filters once the pipeline # is verified working with raw events.}output { elasticsearch { hosts => [ "http://10.0.0.5:9200" ] user => "logstash_writer" password => "${LOGSTASH_WRITER_PASSWORD}" index => "logs-%{+YYYY.MM.dd}" }}
A couple of details:
${LOGSTASH_WRITER_PASSWORD} is interpolated by Logstash at startup from its environment. The variable will be injected into the container by docker-compose (next section).
client_inactivity_timeout => 3600: the Beats input closes idle TCP connections after this many seconds. The default (60s) is too aggressive for long-lived Filebeat connections that may sit idle between batches: 1h is a safer upper bound.
Daily indices (logs-%{+YYYY.MM.dd}): easy to roll, easy to delete with ILM. One day per index means a mapping conflict is contained to a single day.
services:
  logstash:
    image: docker.elastic.co/logstash/logstash:8.15.0
    container_name: logstash
    user: "1000:1000"
    environment:
      LS_JAVA_OPTS: "-Xms1g -Xmx1g"
      # Passed through from the local .env so pipeline/main.conf can use ${LOGSTASH_WRITER_PASSWORD}
      LOGSTASH_WRITER_PASSWORD: "${LOGSTASH_WRITER_PASSWORD}"
    volumes:
      - /opt/observability-logs/pipeline:/usr/share/logstash/pipeline:ro
      - /opt/observability-logs/config/logstash.yml:/usr/share/logstash/config/logstash.yml:ro
      - /opt/observability-logs/data:/usr/share/logstash/data
    ports:
      - "5044:5044"        # Beats input — reached by HAProxy from the VIP
      - "9600:9600"        # Monitoring API — private network only
    restart: unless-stopped
    healthcheck:
      test: ["CMD-SHELL", "curl -fsS http://localhost:9600 || exit 1"]
      interval: 30s
      retries: 5
IMPORTANT
Keep the pipeline/ directory containing only the pipeline file you intend to load.
Backup copies (main.conf.bak) placed in the same folder will be loaded as additional pipelines and cause Address already in use on port 5044. Store backups outside this directory.
Bring it up and watch for the “pipeline started” line:
8. Start it
cd /opt/observability-logssudo docker compose up -d# Wait ~60s for Logstash to come up, then tail the logssudo docker compose logs -f logstash
Look for:
[INFO ][logstash.outputs.elasticsearch] Restored connection to ES instance {:url=>"http://logstash_writer:xxxxxx@10.0.0.5:9200/"}
[INFO ][logstash.javapipeline ][main] Pipeline started {"pipeline.id"=>"main"}
[INFO ][logstash.agent          ] Successfully started Logstash API endpoint {:port=>9600, :ssl_enabled=>false}
If you see Got response code '401' contacting Elasticsearch, the password in .env doesn’t match the one in ES: re-check it from the VPS .env.
The Logstash workers are up, but Filebeat shouldn’t talk to them directly: we want a single, highly-available endpoint in front.
Enter the LB pair: two HAProxy instances on loglb01 and loglb02, sharing a Virtual IP managed by Keepalived.
HAProxy on both LBs
Drop the same config on both loglb01 and loglb02, install and bring up the service:
1. The configuration file
/etc/haproxy/haproxy.cfg — identical on both loglb01 and loglb02:
Example: my haproxy.cfg
global log /dev/log local0 log /dev/log local1 notice chroot /var/lib/haproxy stats socket /run/haproxy/admin.sock mode 660 level admin stats timeout 30s user haproxy group haproxy daemondefaults log global mode tcp option dontlognull timeout connect 5s timeout client 24h timeout server 24h timeout tunnel 24h timeout check 5s# ─────────────────────────────────────────────────────────# Stats UI on :8404 — private network only# Browse http://<lb-ip>:8404/ to see live backend status# ─────────────────────────────────────────────────────────frontend stats bind *:8404 mode http stats enable stats uri / stats refresh 10s# ─────────────────────────────────────────────────────────# Beats input on :5044 — round-robin to Logstash workers# ─────────────────────────────────────────────────────────frontend beats_in bind *:5044 mode tcp option tcplog default_backend logstash_poolbackend logstash_pool mode tcp balance roundrobin option tcp-check default-server inter 5s fall 3 rise 2 server logstash01 10.0.0.21:5044 check server logstash02 10.0.0.22:5044 check
global block: standard daemon setup. Log forwarding to syslog via /dev/log (UNIX socket).
defaults → mode tcp: the entire instance defaults to TCP. The stats frontend later overrides this to mode http for the dashboard.
defaults → timeout client/server/tunnel 24h: the critical setting for long-lived Beats connections. With the package default of 1m you’d see Filebeat reconnect every minute, polluting the logs.
frontend stats on :8404: the HTML/CSV stats UI. In TCP mode it would be opaque, so this single frontend overrides to mode http.
frontend beats_in on :5044: the actual Beats receiver. option tcplog ensures each session is logged with byte counts and a state code on close.
backend logstash_pool:
balance roundrobin distributes connections one-by-one across logstash01 and logstash02.
option tcp-check says “probe by opening a TCP socket”: no Beats handshake, just a connect.
default-server inter 5s fall 3 rise 2 applies to both server lines: probe cadence is 5 s, mark DOWN after three failures (15 s), mark UP after two successes (10 s).
# On both loglb01 and loglb02sudo apt updatesudo apt install -y haproxy# Drop the config above into /etc/haproxy/haproxy.cfgsudo nano /etc/haproxy/haproxy.cfg# Validate before applying — never skip thissudo haproxy -c -f /etc/haproxy/haproxy.cfg# Output: "Configuration file is valid"# Enable + startsudo systemctl enable --now haproxysudo systemctl status haproxy --no-pager | head -5
frontend/backend  svname        scur  bin       bout      status
beats_in          FRONTEND      0     0         0         OPEN
logstash_pool     logstash01    0     0         0         UP
logstash_pool     logstash02    0     0         0         UP
logstash_pool     BACKEND       0     0         0         UP
As Filebeat clients connect, scur (current sessions) and bin/bout (byte counters) start moving. If a Logstash worker dies, its row flips to DOWN within ~15 s and scur redistributes to the survivors.
global_defs: enable_script_security + script_user root are required for vrrp_script to execute under modern Keepalived. router_id is a string used only for logging: useful to distinguish which host is logging what.
vrrp_script chk_haproxy: checks the local process every 2 s. weight -20 says “subtract 20 from priority while the check fails”. With master = 110 and backup = 100, a HAProxy crash on the master lowers it to 90 → backup (100) wins.
state MASTER / BACKUP: just the initial role, doesn’t actually decide who wins.
virtual_router_id 51: chosen arbitrarily, must match on both peers, must not collide with any other VRRP group on this L2.
priority 110 / 100: the real election weights. 10-point gap leaves headroom for the -20 track-script adjustment.
auth_pass: same 8-char value on both peers. Set with openssl rand -hex 4 to get a clean ASCII secret.
virtual_ipaddress 10.0.0.10/24: the VIP. Note the /24 matches the LAN’s CIDR: important for ARP resolution to work correctly.
track_script { chk_haproxy }: ties the health-check to the priority adjustment.
Verify the election (loglb01 wins, owns the VIP) and then test failover by stopping HAProxy on the master, the VIP should migrate to loglb02 within ~5 seconds:
4. Verify election and VIP ownership
# On loglb01 — should be MASTER, owns the VIPjournalctl -u keepalived -n 10 --no-pager | grep -E "STATE|MASTER|BACKUP"ip addr show eth0 | grep 10.0.0.10# On loglb02 — should be BACKUP, no VIP attachedjournalctl -u keepalived -n 10 --no-pager | grep -E "STATE|MASTER|BACKUP"ip addr show eth0 | grep 10.0.0.10 && echo "✗ VIP attached on BACKUP (split-brain)" || echo "✓ no VIP on BACKUP (correct)"
Expected journal lines:
loglb01 Keepalived_vrrp: (VI_LOGS) Entering BACKUP STATE (init)
loglb01 Keepalived_vrrp: (VI_LOGS) Entering MASTER STATE
loglb02 Keepalived_vrrp: (VI_LOGS) Entering BACKUP STATE (init)
(Both nodes start in BACKUP, then loglb01 promotes itself within 3 s because it sees no MASTER with higher priority)
Stop HAProxy on the master and confirm the VIP migrates:
# On loglb01sudo systemctl stop haproxydate -u +%T# Check ~5 s later on loglb02ip addr show eth0 | grep 10.0.0.10 # should now show the VIPjournalctl -u keepalived -n 5 --no-pager | grep "MASTER STATE"
Expected: loglb02 enters MASTER STATE within ~5 s of the HAProxy stop, attaches 10.0.0.10/24 to eth0, sends gratuitous ARP.
Clients on the L2 segment see no interruption beyond the brief gap.
Recover:
# On loglb01sudo systemctl start haproxy# Within ~5 s, loglb01 wins the election back (priority 110 vs 100)# and the VIP migrates back. Add `nopreempt` to the loglb02 config# if you'd rather have it keep the VIP — saves one extra glitch.
Filebeat and Elasticsearch don’t have to match versions exactly.
Elastic guarantees forward compatibility within a major version, so a newer Filebeat against an older Elasticsearch is supported… BUT the reverse (older Filebeat → newer ES) is not.
Then the config, pointing output.logstash at the HAProxy VIP at 10.0.0.10:5044:
2. /etc/filebeat/filebeat.yml
The shipped default config is heavy with disabled modules.
Replace it cleanly:
Example: my filebeat.yml setup
sudo cp /etc/filebeat/filebeat.yml /etc/filebeat/filebeat.yml.origsudo tee /etc/filebeat/filebeat.yml > /dev/null <<'EOF'# ============================== Inputs ==================================filebeat.inputs: - type: filestream id: syslog-files enabled: true paths: - /var/log/syslog - /var/log/auth.log fields: log_source: "syslog" fields_under_root: true - type: journald id: systemd enabled: true fields: log_source: "journald" fields_under_root: true# ============================== Autodiscover ============================# Pick up logs from any Docker container on this host automatically.filebeat.autodiscover: providers: - type: docker hints.enabled: true# ============================== Processors ==============================processors: - add_host_metadata: when.not.contains.tags: forwarded - add_docker_metadata: ~# ============================== Output ==================================# Ship to the HAProxy VIP. The two LB nodes share this VIP via Keepalived;# whichever HAProxy currently owns it serves the traffic, with automatic# failover.output.logstash: hosts: ["10.0.0.10:5044"]# ============================== Setup ===================================# Output is Logstash, which writes to logs-* with its own index pattern.# Disable Filebeat's direct-to-ES setup steps — those target "filebeat-*"# indices we don't actually use here.setup.template.enabled: falsesetup.ilm.enabled: falsesetup.dashboards.enabled: false# ============================== Logging =================================logging.level: infologging.to_files: truelogging.files: path: /var/log/filebeat name: filebeat keepfiles: 7 permissions: 0644EOFsudo chmod 600 /etc/filebeat/filebeat.yml
A few notes on each section:
fields_under_root: true promotes the custom log_source to a top-level field instead of nesting it under fields.log_source. Makes Kibana queries cleaner (log_source:syslog vs fields.log_source:syslog).
Autodiscover with docker provider + hints.enabled: true auto-attaches to every running container, reads its stdout/stderr from /var/lib/docker/containers/<id>/*.log.
add_host_metadata enriches every event with the hostname, OS, architecture. Crucial later when you scale beyond one shipper.
add_docker_metadata does the same for Docker events: container name, image, labels.
WARNING
Always disable setup.template, setup.ilm, and setup.dashboards when shipping to Logstash. Otherwise Filebeat tries to reach Elasticsearch directly also, fails because it has no ES credentials, and prints a stream of warnings at every startup.
They’re harmless, but they confuse a real diagnosis.
Sanity-check the config, then enable and start the service:
3. Sanity-check the config
# YAML / structure validationsudo filebeat test config# Connectivity to the configured output (TCP reach + protocol handshake)sudo filebeat test output
Expected output for the second one:
logstash: 10.0.0.10:5044...
  connection...
    parse host... OK
    dns lookup... OK
    addresses: 10.0.0.10
    dial up... OK
  TLS... WARN secure connection disabled
  talk to server... OK
(TLS warning is expected: we’re on a private network, and Logstash’s Beats input is not TLS-enabled in this lab)
If the dial-up step fails, the path between Filebeat and the VIP is broken.
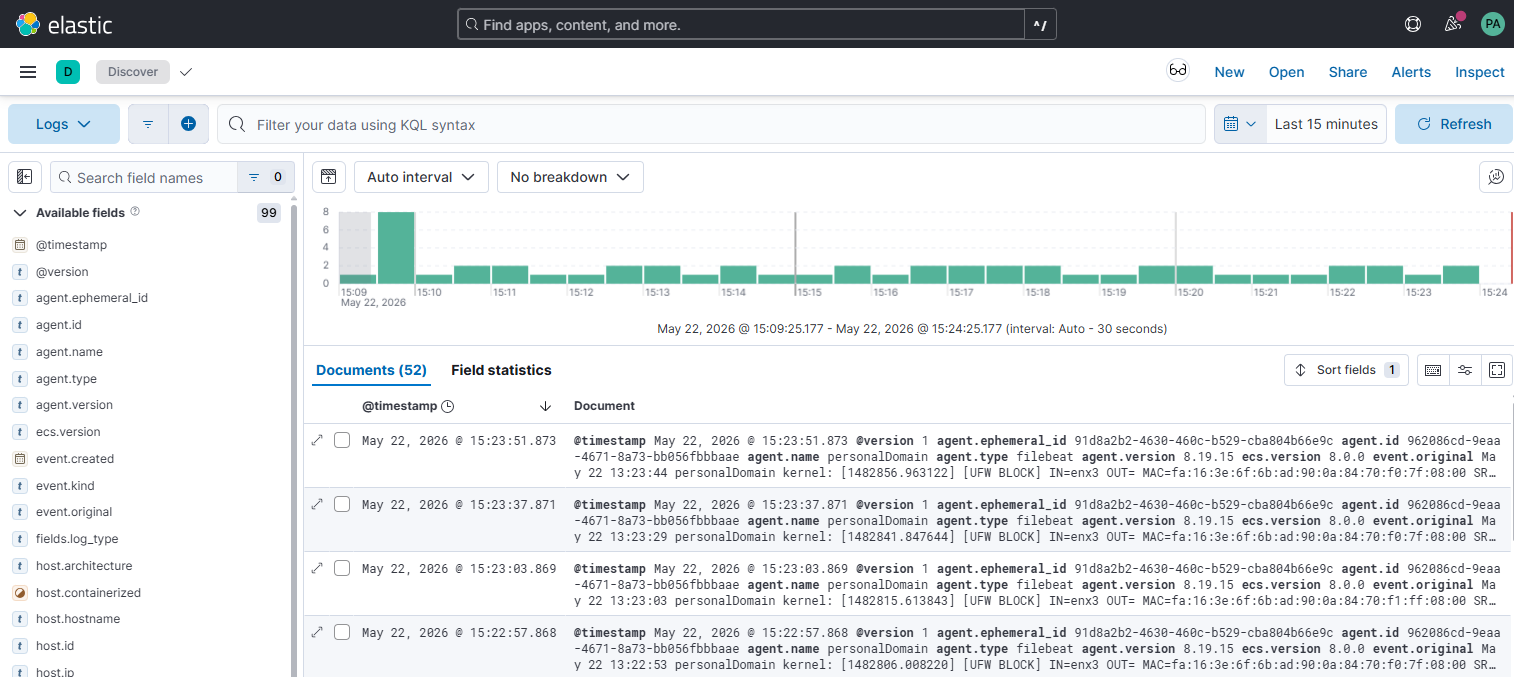
We have a complete, scalable ELK stack mirroring the shape used in real production environments: five hosts, six components, end-to-end log pipeline from journalctl to Discover.
Congratulations!
To keep the stack healthy long-term, I leave you with the closing thoughts:
Final considerations
You’re done.
Congratulations!
If you’ve followed the series from the start, you now have an end-to-end log pipeline running on five hosts:
Elasticsearch indexing on the VPS
Kibana serving the dashboard (with anonymous read-only viewing)
Two Logstash workers parsing in parallel
Two HAProxy + Keepalived fronting the workers, with a single highly-available VIP
Filebeat pushing syslog / journald / Docker logs into that VIP.
Smaller than what you’d run in production, but pretty identical in shape.
General pipeline monitoring
A log pipeline that doesn’t tell you when it itself is broken, is half-built.
The five-minute health round:
Component
Quick check
Looking for
Elasticsearch
curl :9200/_cluster/health
status: yellow (lab) / green (cluster)
Kibana
curl :5601/logs/api/status
HTTP 200, overall.level: available
Logstash worker
curl :9600
status: green, events.in rising
HAProxy
curl :8404/;csv
both Logstash backends UP, scur > 0
Keepalived
ip addr show | grep 10.0.0.10
VIP on MASTER, absent on BACKUP
Filebeat
journalctl -u filebeat -n 20
Connection ... established, no dial errors
From a lab to real production
For real production scenarios, consider:
What changes when you have 2000+ machines
backing up the ES data periodically: The ILM policy from the Elasticsearch setup only deletes old indices, but it doesn’t back anything up, and if the VPS disk dies, the logs go with it. The native answer is an ES Backup Repository, pointed at S3 or a separate volume.
More Logstash workers behind the same LB pair: HAProxy’s balance roundrobin scales horizontally for free until you saturate the LB itself.
Multiple LB pairs geographically distributed, often with DNS round-robin in front, when one VIP can’t handle the throughput anymore.
A Kafka cluster between Beats and Logstash as a buffer: absorbs traffic spikes that even a HA-LB can’t smooth out, and decouples producers from consumers (LS can be down for maintenance and no events are lost).
An Elasticsearch cluster with separate node types: 3+ master, 5-20+ data, 2-4 ingest, 2-4 coordinator. This is where the real bottleneck lives (indexing throughput, shard count, JVM heap pressure).
Multi-tenant Kibana spaces so different teams can have their own dashboards, saved searches, and role-based access on the same ES backend.