This guide wires GitLab into AWX so that inventories, playbooks, roles and collections all live in versioned, reviewable Git reposI.
Git becomes the single source of truth: AWX just mirrors it.
The model: one mechanism, two consumers
A Project in AWX = a Git repo, cloned and kept in sync.
Its a live link, not a one-time import.
Basically, we can create a project that will contain our inventories, and another one for our playbooks, and link everything together to make it run.
flowchart LR
    subgraph GL["🦊 GitLab"]
        PB["automation/playbooks<br/>site.yml + roles/ + collections/"]
        INV["inventories/prod<br/>openstack/openstack.yml + group_vars/"]
    end
    subgraph AWX["🎛️ AWX"]
        ProjPB["📚 Project (playbooks)"]
        ProjINV["📚 Project (inventories)"]
        Src["🔗 Inventory Source"]
        Inv["📋 Inventory"]
        JT["▶️ Job Template<br/>Project + Playbook + Inventory"]
    end
    Target["🖥️ target hosts"]
    PB -- "git clone" --> ProjPB
    INV -- "git clone" --> ProjINV
    ProjINV --> Src
    Src -- "sync = import" --> Inv
    ProjPB --> JT
    Inv --> JT
    JT -- "run via execution node" --> Target
- Job Templates pick a playbook from inside a Project
- Inventory Sources pick an inventory file from a Project
- roles / collections come in through
requirements.yml, automatically on Project sync.
INFO
A green Sync Status: Success on an inventory, or a Job Template that just has a playbook dropdown, both mean the same thing underneath: a Project (Git) behind it.
1. GitLab: the repos
There are many other "layouts" you can use in GitLab....
For example, the “all-in-one” playbook + inventory projects:
linux-hardening/ # project that contains both playbook and inventory ├── ansible.cfg ├── inventory.yml ├── group_vars/ │ └── hardened_servers.yml ├── linux-hardening.yml
Down below I show you the layout I use for separating multiple environments (prod, test, dev…)
First we have to create Groups:
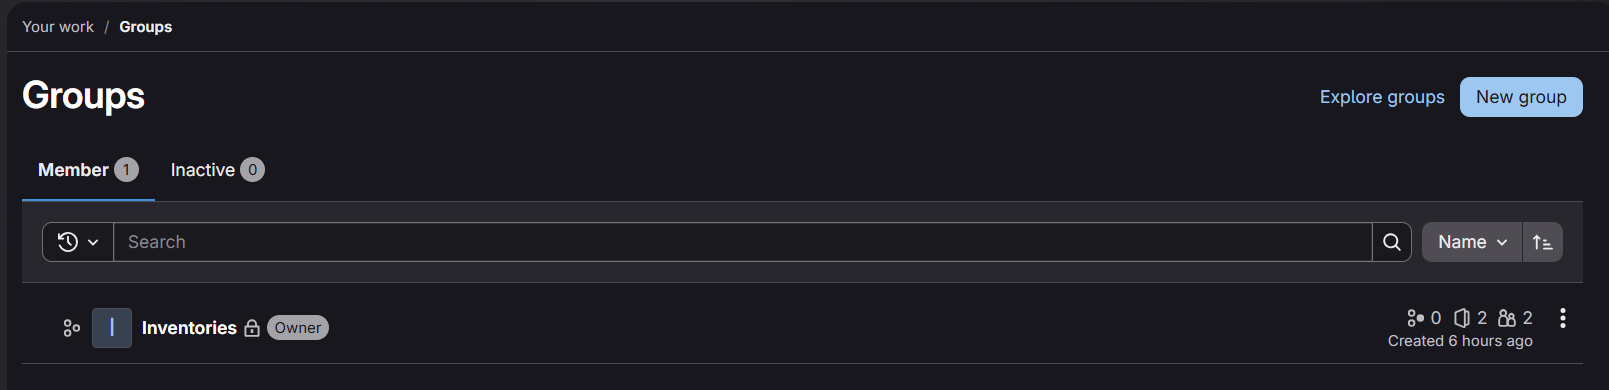
This is my Inventories group, it contains projects organized per environment (prod, test, dev…), and every project contain its inventory file + group_vars/ together.
For example:
inventories/prod # inventories is the group, prod is the project
└── openstack/ # openstack is just a folder
    ├── openstack.yml # this is the inventory file
    └── group_vars/all.yml # these are the group_vars
inventories/test
└── openstack/
...
IMPORTANT
Keep
group_vars/in the same folder as the inventory file, that’s how Ansible (and AWX’s import) auto-loads them.
This is my Automation group, it contains a Playbooks project, that contains many folders for dedicated playbooks, for example:
automation/playbooks
└── UpgradeHost/
	├── upgrade.yml
	├── roles/requirements.yml         # external roles (Galaxy or Git)
	└── collections/requirements.yml   # external collections
└── JoinAD/
...
2. GitLab: read-only SSH access (one credential for all repos)
AWX only needs to clone.
To do that, we can use a read-only service account with a dedicated SSH key, member of every group: this way one credential can clone every repo.
Procedure:
- Bot user: Admin → Users → New user →
svc-awx.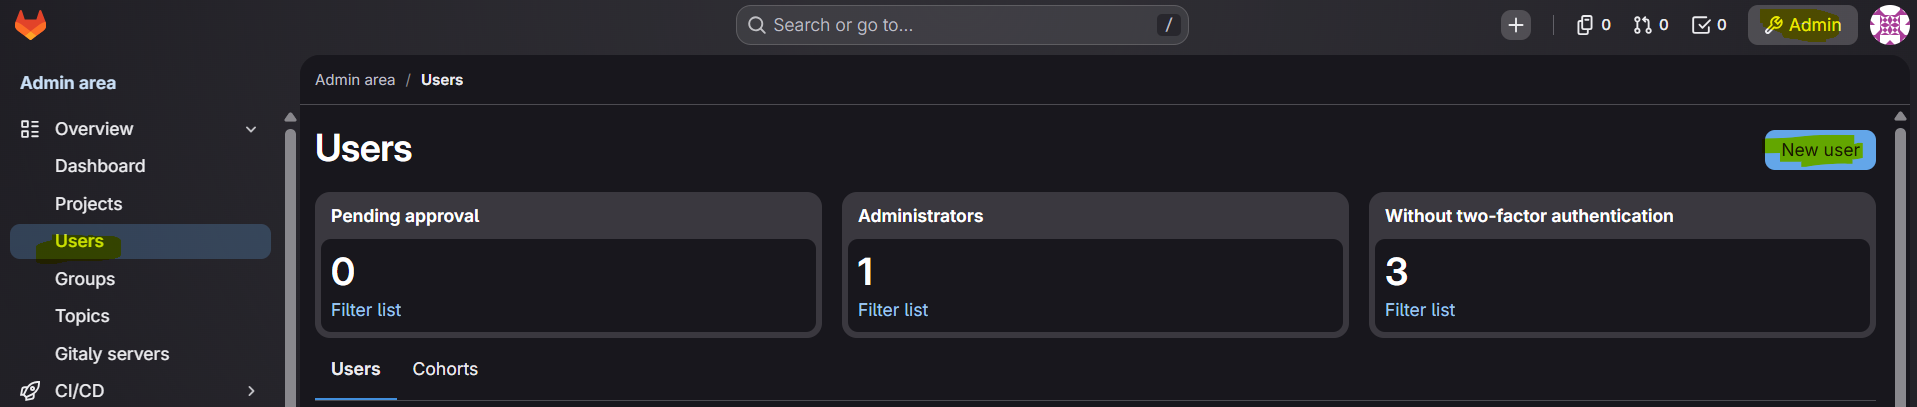
- Read access: each group (
inventories,automation…) → Manage → Members → Invite →svc-awx→ role Reporter.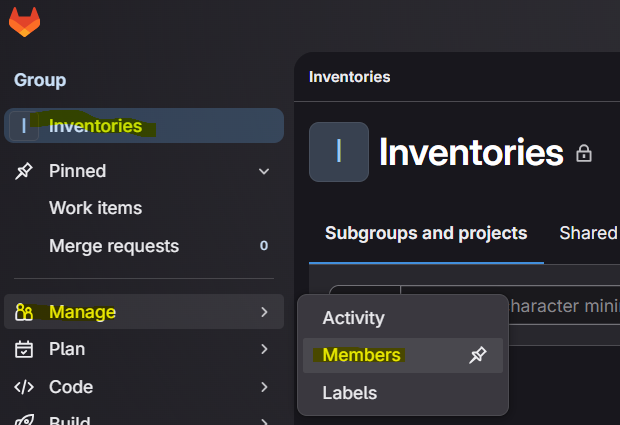
- Create a SSH key:
ssh-keygen -t ed25519 -f svc-awx -C svc-awx -N "" - Admin → Users →
svc-awx→ Impersonate → Preferences → SSH Keys → pastesvc-awx.pub→ Stop impersonation.
Lighter alternative: an SSH deploy key (per-repo)
Add the public key as a read-only Deploy key (Repo → Settings → Repository → Deploy keys, Grant write permissions OFF), and enable the same key on other repos. SSH too, just per-repo instead of group-wide.
Besides the key we just created for syncing projects and inventories, every target needs:
- A key for letting in the execution nodes via SSH (that you will select later in AWX when running the playbook): the public half goes in the target’s
~/.ssh/authorized_keys, while the private half stays in every execution nodes. You can of course recycle it for every target: you just need to create it in a execution node, and dossh-copy-id -i awx_target.pub <user>@<target-ip>(and of course you also need to put the private key inside every other execution node that you have). - Every target allowing
:22from the execution node’s IP as source.
3. AWX: Source Control credential (SSH)
Resources → Credentials → Add
-
Credential Type:
Source Control -
SCM Private Key: the private
svc-awxkey -
Leave Username / Password / Passphrase empty (the user comes from the
git@URL).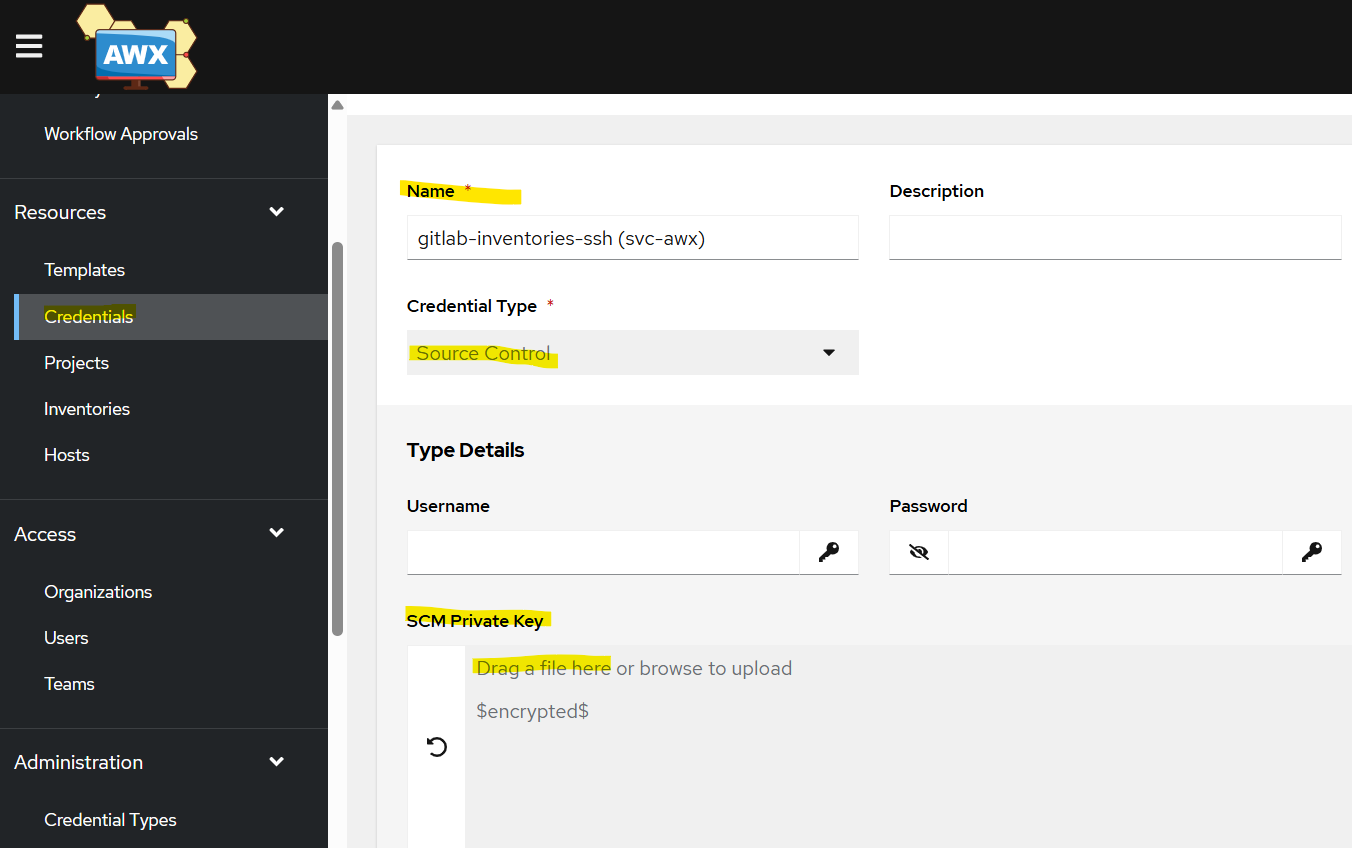
4. AWX: one Project per repo
Create a Project for each repo: same steps, different URL.
Resources → Projects → Add:
| Field | Playbooks | Inventories |
|---|---|---|
| Name | Playbooks | Inventories |
| Source Control Type | Git | Git |
| Source Control URL | git@gitlab.yourdomain.com:automation/playbooks.git | git@gitlab.yourdomain.com:inventories/prod.git |
| Source Control Credential | svc-awx | svc-awx |
| Options | ✅ Update Revision on Launch | ✅ Update Revision on Launch |
For the Source Control URL, you have to copy the exact SSH URL from the GitLab repo’s Code → Clone with SSH.
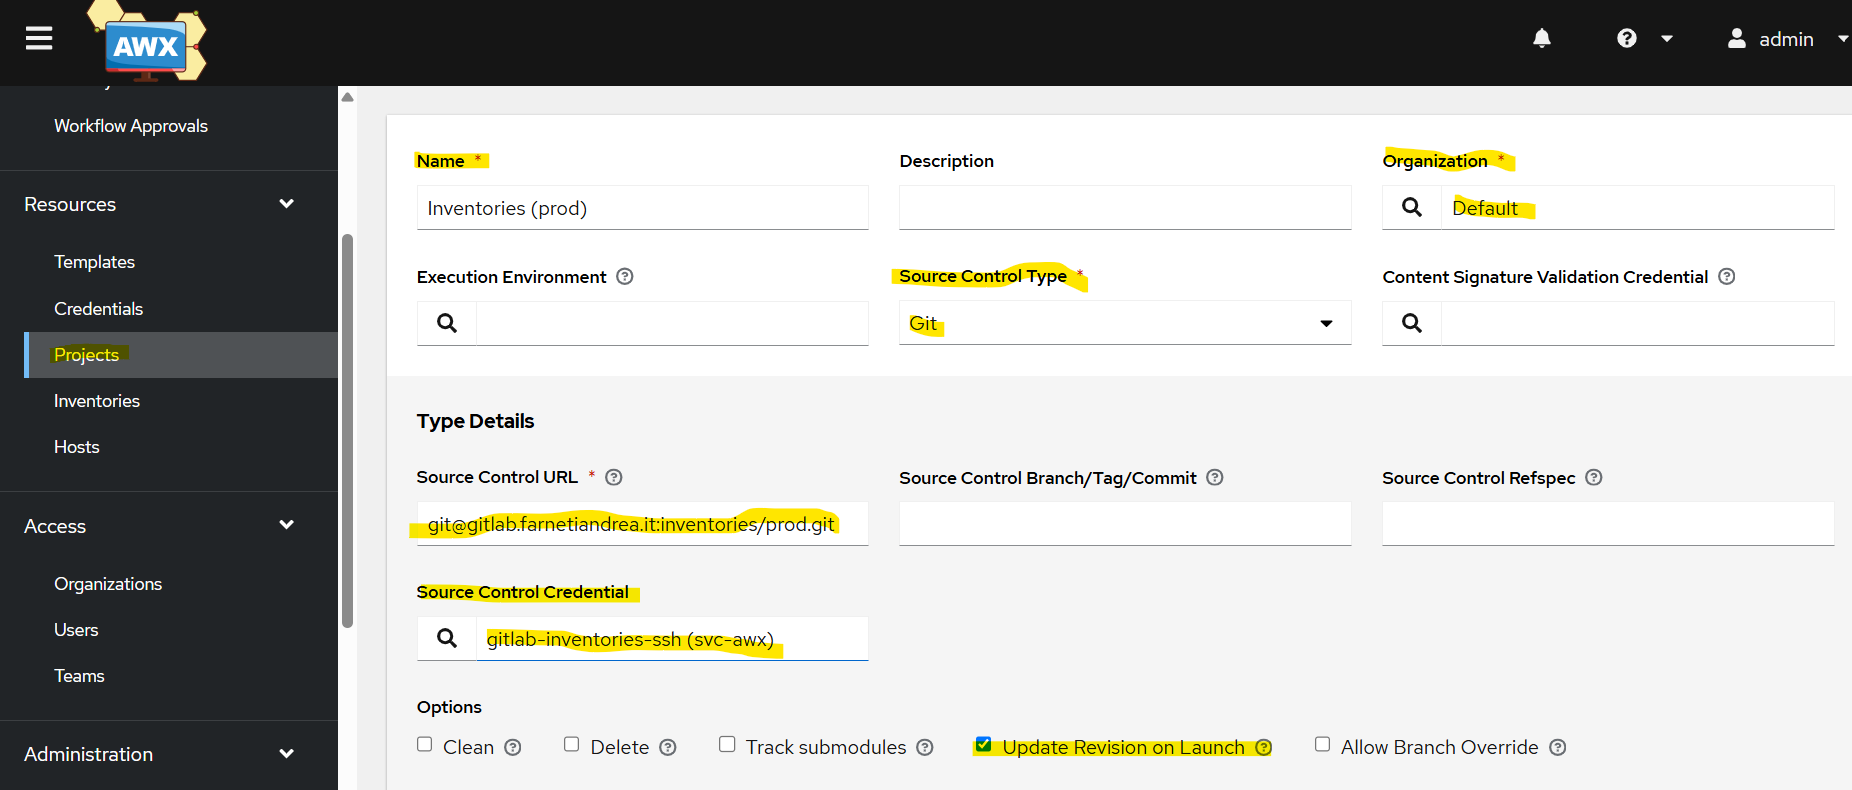
Save each, and wait for Successful.
Ok, so now your AWX can see inventories and playbooks from your GitLab.
Now let’s see how to actually put everything together in AWX:
- Inventories in a inventory source
- Playbooks in a job template
And combine them to make everything work and run.
Inventories → Inventory + Source
Resources → Inventories → Add → Inventory → Name → Save (this is just an empty container for now).
Now open it: Sources tab (appears only after saving) → Add:
| Field | Value |
|---|---|
| Source | Sourced from a Project |
| Project | Inventories |
| Inventory file | openstack/openstack.yml (in this example) (not the same as screenshot) |
| Options | ✅ Update on launch · ✅ Overwrite · ✅ Overwrite variables |
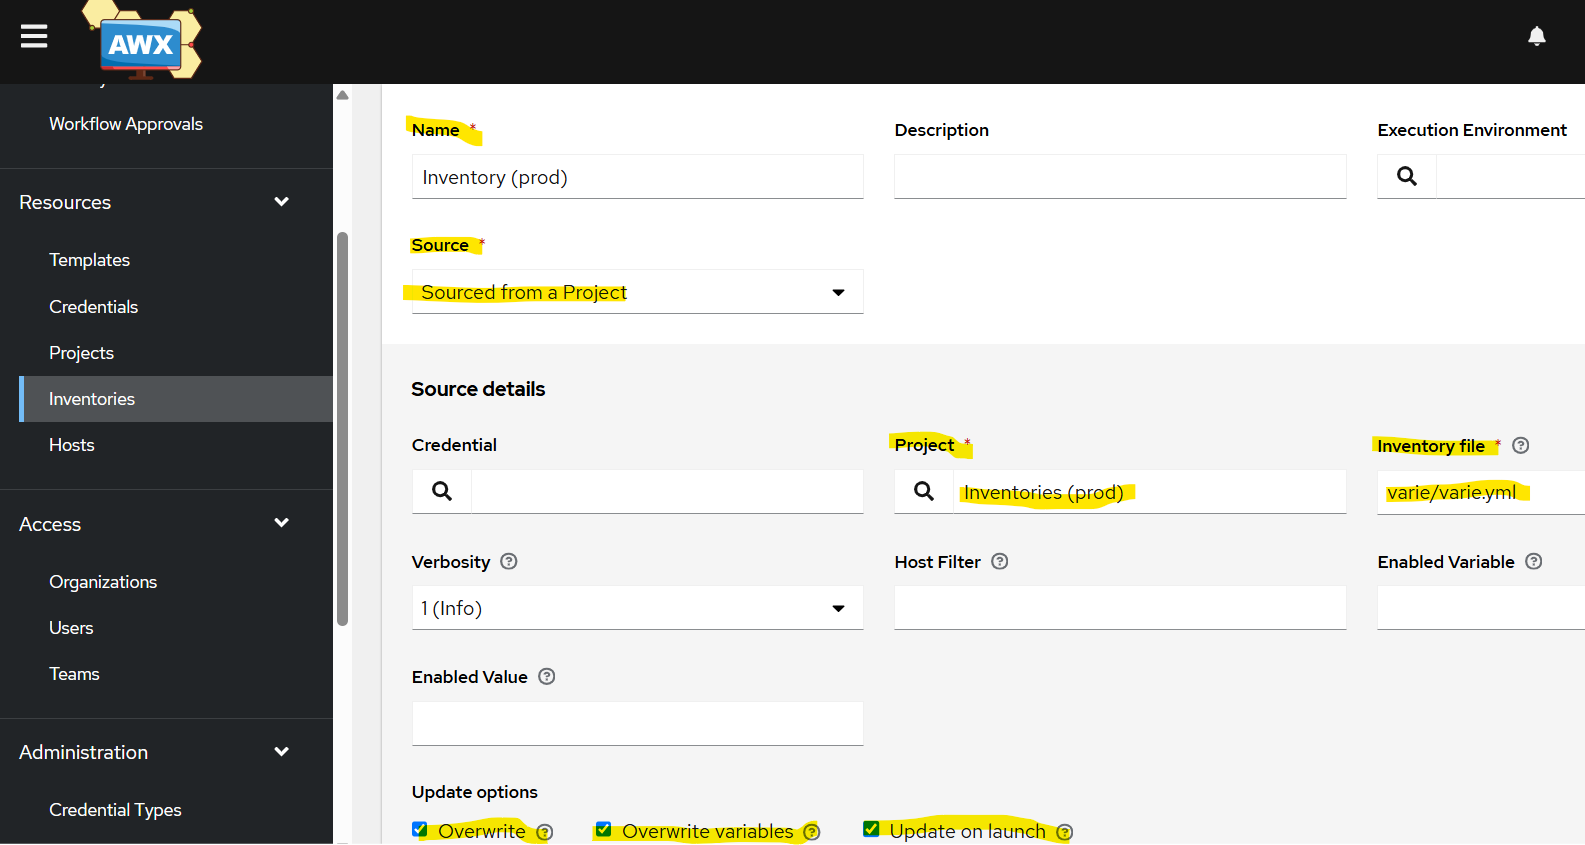 |
Save → Sync.
The "Inventory file" dropdown only shows
/ (project root)AWX auto-lists inventory files at the repo root: files that are in subfolders often aren’t suggested.
The field is typeable: just type your inventory path (in my example
openstack/openstack.yml) relative to the repo root.
Playbooks → Job Template
This is the main use of a Project.
Resources → Templates → Add → Job Template:
| Field | Value |
|---|---|
| Name | The name of the job Template |
| Job Type | Run |
| Inventory | OpenStack (from the one we just created) |
| Project | Playbooks |
| Playbook | playbookName.yml (dropdown, auto-detected) |
| Credentials | the Machine credential for the targets |
| Instance Groups | execution-vms (run on the execution node) |
Save → Launch.
Scaling out
Git stays the single source of truth, AWX has to mirror it:
- playbooks GitLab repo → AWX Project → create many Job Templates
- inventories GitLab repo → AWX Project → add many Inventory Sources (one per type:
openstack/,windows/…)